
Draw a scaled top, pick a stable base, and design a safe, adjustable fence.
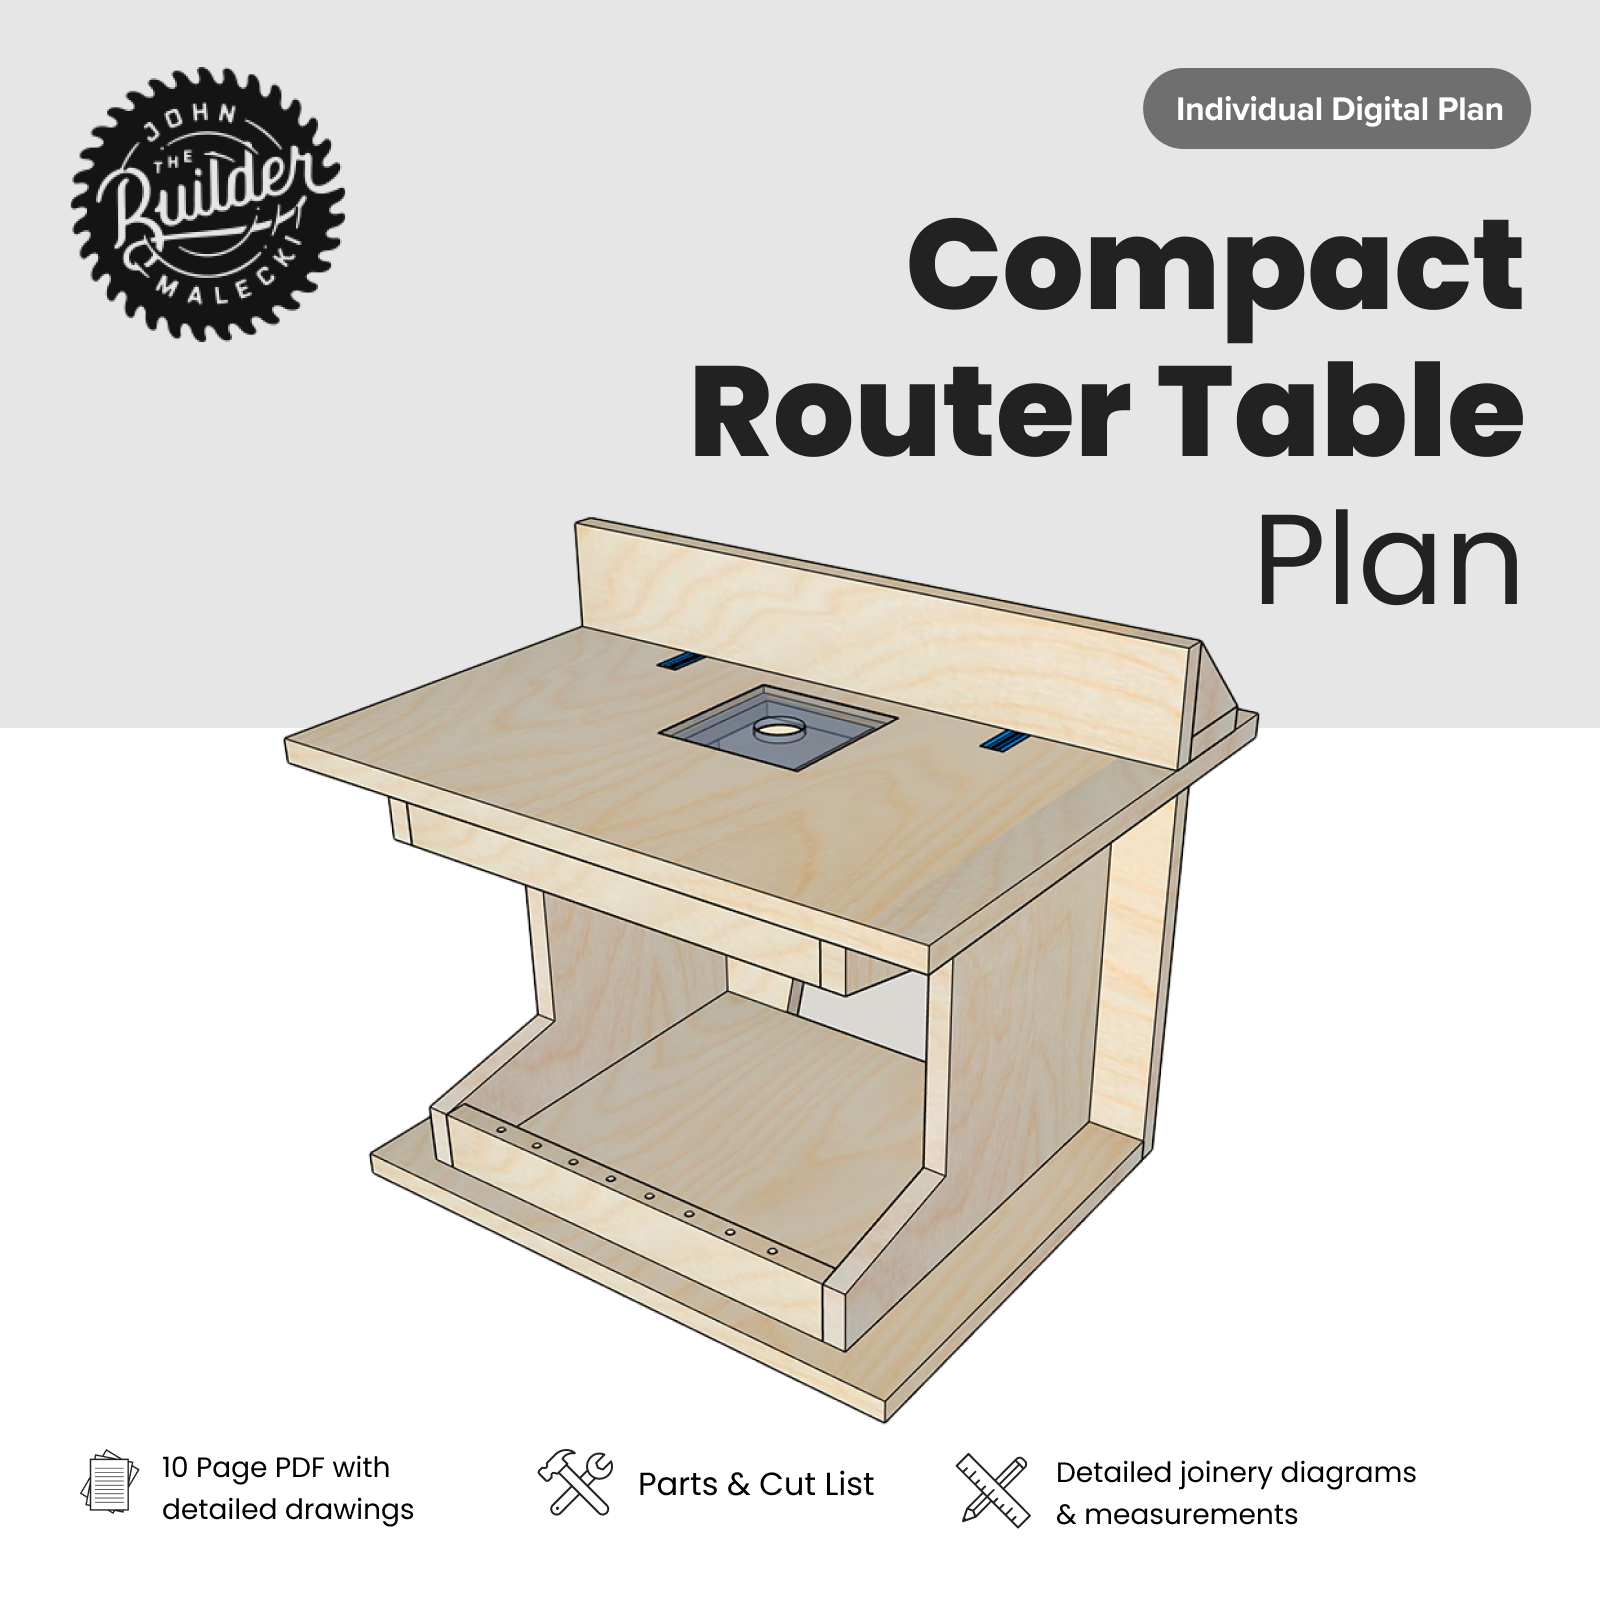
If you have ever wondered how to make a router table plans that fits your shop, this guide is for you. I have built and tuned many tables over the years.
I will show you how to make smart choices, draft clean drawings, and avoid common mistakes. Keep reading to learn how to make a router table plans that is safe, accurate, and built for long-term use.

What a Router Table Does and Why Plans Matter?
A router table turns a handheld router into a precision station. It gives you control, repeatability, and safety for small or narrow work. Good plans make the work flow smooth. Poor plans waste time and money.
Many readers ask how to make a router table plans that they can trust. The answer is to focus on flatness, dust control, and a fence that stays square. Add smart workholding, and your results will jump.

Core Design Choices Before You Draft
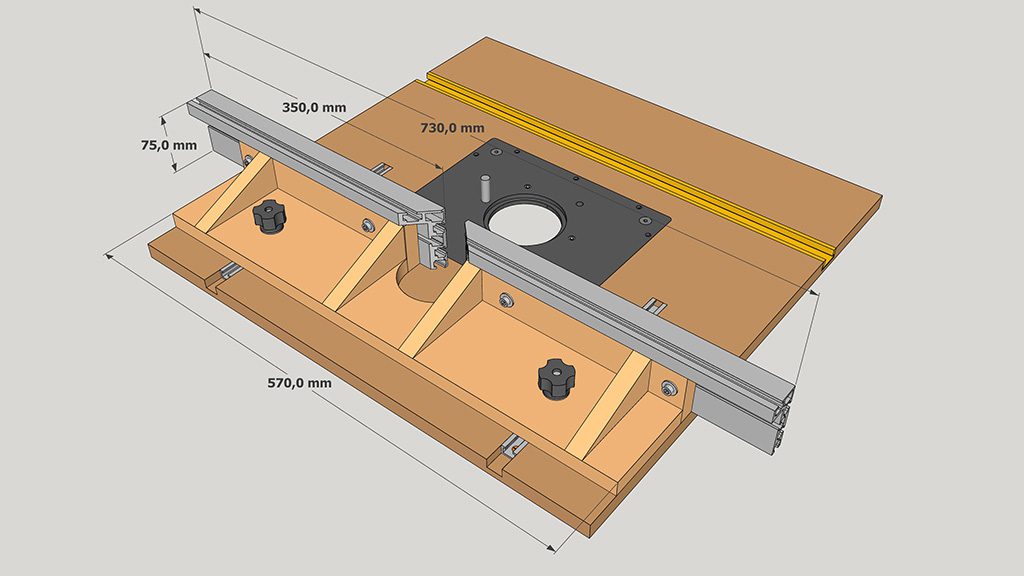
Plan the overall size. A common top is 24 by 32 inches. Keep the thickness near 1.5 inches for stiffness. Use two layers of 3/4-inch MDF laminated with high-pressure laminate on both faces.
Choose an insert plate or a router lift. A 3/8-inch aluminum plate with levelers is stable. A lift is faster for bit changes and height control.
Decide on a stand. A cabinet base adds storage and dust control. An open stand is light and cheap. When you think about how to make a router table plans, make sure your stand height fits your stance and reach.
Materials and Hardware Checklist
Here is a clean list to buy and cut with confidence.
- Sheet goods: Two 3/4-inch MDF sheets for the top and fence. One sheet 3/4-inch plywood for the base and shelves.
- High-pressure laminate: One sheet for the top and fence faces.
- Insert plate or lift: 3/8-inch aluminum with leveling screws and ring set.
- T-tracks: One 3/4 by 3/8-inch miter track and T-tracks for featherboards and stops.
- Fence hardware: Knobs, bolts, threaded inserts, and a 2.5-inch or 4-inch dust port.
- Fasteners and glue: Wood screws, pocket screws, and PVA glue.
- Power: Switch with big paddle and 15A or 20A rating, plus a router-rated cord.
- Safety and dust: Featherboards, push blocks, ear and eye protection, and a dust hose.
Add this to your notes if you search how to make a router table plans for a first build. Keep the list tight and clear to avoid extra trips.
Step-by-Step: Drafting Your Router Table Plans
This is the heart of how to make a router table plans that you can build now or later. Use graph paper or a simple CAD app.
- Set key sizes
- Top: 24 by 32 inches. Thickness 1.5 inches.
- Router plate opening: Follow the plate template. Most plates are about 9.25 by 11.75 inches.
- Fence base: 32 inches long.
- Cabinet: 18 to 22 inches deep. Height to suit you, often 34 to 36 inches.
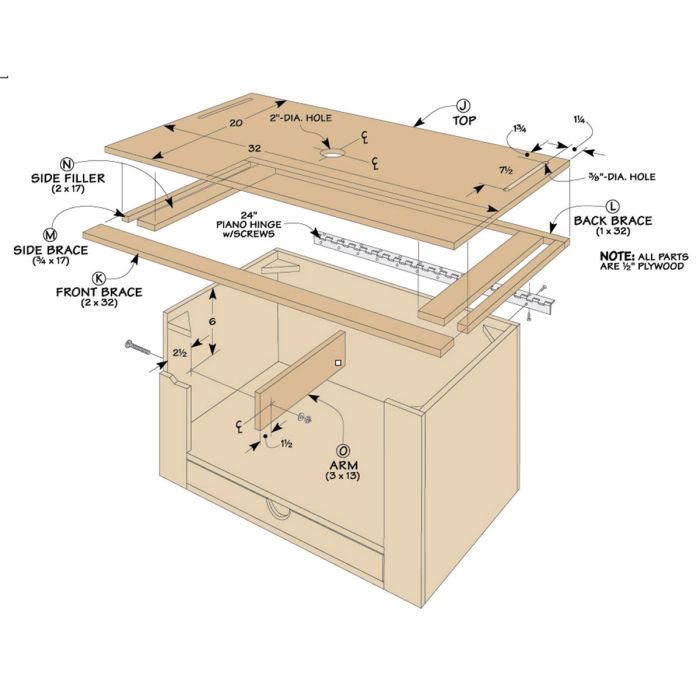
- Draw the top
- Show the plate cutout centered left to right. Place it a bit forward so your workpiece has more outfeed support.
- Add a miter track parallel to the front edge. Keep it 3 inches from the bit centerline.
- Draw the fence
- Use a split face fence to close around bits.
- Include a micro-adjust slot, T-tracks on top, and a 2.5-inch dust port behind the bit.
- Draw the base
- Plan sides, a bottom, and shelves.
- Add a large dust cavity under the router. Include a rear 4-inch port if you have a dust collector.
- Mark a power switch at the front left.
- Note joinery
- Use pocket screws for the cabinet.
- Use glue and screws for the top lamination.
- Use threaded inserts for fence bolts to resist wear.
- Add a cut list
- List every part with length, width, and thickness.
- Add notes for edge banding and laminate.
- Add tolerances
- Top flat within 0.010 inch.
- Fence square within 0.002 inch over 4 inches.
- Review for safety
- Clear bit guard area.
- No pinch points.
- Easy access to switch and cord.
Save or print your work. Now your drawing shows how to make a router table plans you can build with confidence.

Building Tips From the Shop Floor
This advice comes from many builds and fixes in my shop.
- Keep the top flat
Glue both faces with laminate to balance the panel. Trim flush after the glue cures. - Make the plate opening clean
Use the included template. Take shallow passes with a pattern bit. Test the fit. Add corner relief if needed. - Fence faces should slide
Use laminate or melamine on the faces. Add shims for micro-tuning around large bits. - Use levelers under the plate
Four or eight set screws let you tune the plate flush. Mark the sweet spot so you can return to it.
These steps lock in how to make a router table plans that stays true after many projects.

Safety, Dust Collection, and Noise Control
A router screams at high RPM. Protect your ears and lungs. Wear muffs and a respirator. Use a clear guard and featherboards to hold stock down and in.
Bit speed depends on bit size. Use slower speed for larger bits. As a simple guide, small straight bits can run near full speed.
Large panel bits run slower, often near 10,000 to 12,000 RPM. Always check the bit maker’s chart. If you ask how to make a router table plans that is safe, start with dust and speed notes on page one.

Common Mistakes and How to Fix Them
- Top not flat
Fix by adding more levelers under the plate. If the whole top sags, add a stiffener rail under the front. - Fence not square
Loosen, re-square with a machinist square, and lock down. Add a shim if your faces are not coplanar. - Poor dust collection
Add a rear fence port and a lower cabinet port. Seal leaks with weatherstrip. - Vibration
Bolt the stand to the floor or add mass. Check bit balance and collet condition.
These prevent headaches when you learn how to make a router table plans that lasts.
Cost, Time, and Skill Estimates
Expect to spend a weekend for the cabinet and top. Add a few hours for the fence and tune-up. Cost ranges from budget to premium.
- Budget build
Use MDF, a fixed insert plate, and a shop-made fence. - Mid-range build
Add a router lift and better hardware. - Premium build
Add a steel stand, fine dust ports, and top-grade tracks.
Set a plan that fits your budget before you start. This is key to how to make a router table plans that you will actually finish.
Finishing, Setup, and Calibration
Seal MDF edges with shellac or a thin coat of polyurethane. Wax the top and fence for slick feeding. Install the switch, test the router, and check for clearance.
Calibrate the fence to 90 degrees. Set the miter track parallel to the bit. Use a dial indicator if you have one. Record the settings in your plan packet. This is a smart part of how to make a router table plans that stays repeatable.
Printable Plan Layout and Cut List Strategy
Print your drawings at full scale for the plate template if you can. Keep a sheet with part labels. Tape labels to each part as you cut. This saves time during assembly.
Group cuts by thickness. Break down sheet goods first. Cut to final size at the table saw. Mark grain direction on fence parts. This simple method strengthens how to make a router table plans that even a friend can follow later.
Frequently Asked Questions of how to make a router table plans
What size should my router table top be?
A top of 24 by 32 inches fits most shops and work. It is large enough for control but still easy to move.
Do I need a router lift?
A lift makes height changes fast and precise. If the budget is tight, start with a good insert plate and upgrade later.
What thickness is best for the top?
Aim for about 1.5 inches total. Two layers of 3/4-inch MDF with laminate on both sides stays flat and smooth.
Should I include a miter track?
Yes, add a 3/4 by 3/8-inch track parallel to the front edge. It helps with sleds, stops, and hold-downs.
How do I control dust?
Use a 2.5-inch fence port and a 4-inch cabinet port if possible. Seal gaps and keep airflow direct to the cutter.
What safety gear is essential?
Wear eye and ear protection and a respirator. Use featherboards, push blocks, and a clear bit guard for better control.
How flat does the top need to be?
Keep it within about 0.010 inch across the work area. Use plate levelers and a stout build to hold that tolerance.
Conclusion
A router table can take your joinery and profiles to a new level. Start with a clear drawing, smart material choices, and a fence you can tune. Keep it flat, square, and clean. Test each step as you go.
Take what you learned here and draft your plan tonight. Lay out the top, fence, and base. Then set a budget and a weekend to build. If this helped, subscribe for more shop builds, or leave a comment with your own tips.