
Build a sturdy woodworking table by planning your size, cutting solid parts, assembling a rigid base, adding a flat top, and finishing for durability.
If you want to learn how to make a woodworking table that is flat, strong, and built to last, you are in the right place. I have designed and built many benches for home and pro shops.
Here, I show you how to make a woodworking table with clear steps, smart tips, and the little tricks that save time and money. Stay with me and build it right the first time.
What Makes a Great Woodworking Table?
A great woodworking table is flat, rigid, and heavy. It stays square under load. It does not wobble. It handles hand tools and power tools with ease.
Your table should support clamping and workholding. That means a sturdy apron, dog holes, and space for a vise. The top must resist racking. The base must spread weight well to the floor.
Durable finish and good edges matter. Glue wipes off fast. The surface is easy to clean yet grips wood when needed. Even small upgrades, like leveling feet, make daily work smoother.
To master how to make a woodworking table, start by aiming for flatness and strength above all. The details below show you how to reach both without guesswork.

Planning and Design Essentials
Define your main tasks first. Will you plane by hand, assemble cabinets, or cut joinery? Each task sets the best height, size, and features.
Pick a size that fits your shop and projects. A common choice is 72 inches by 30 inches. Height ranges from 32 to 36 inches for general work. If you do hand planing, go lower. If you do detail work, go higher.
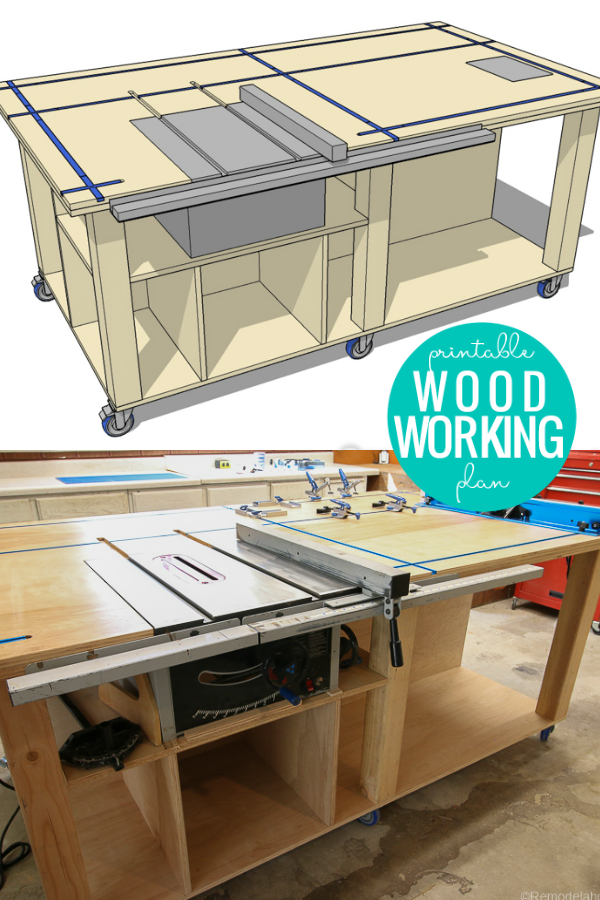
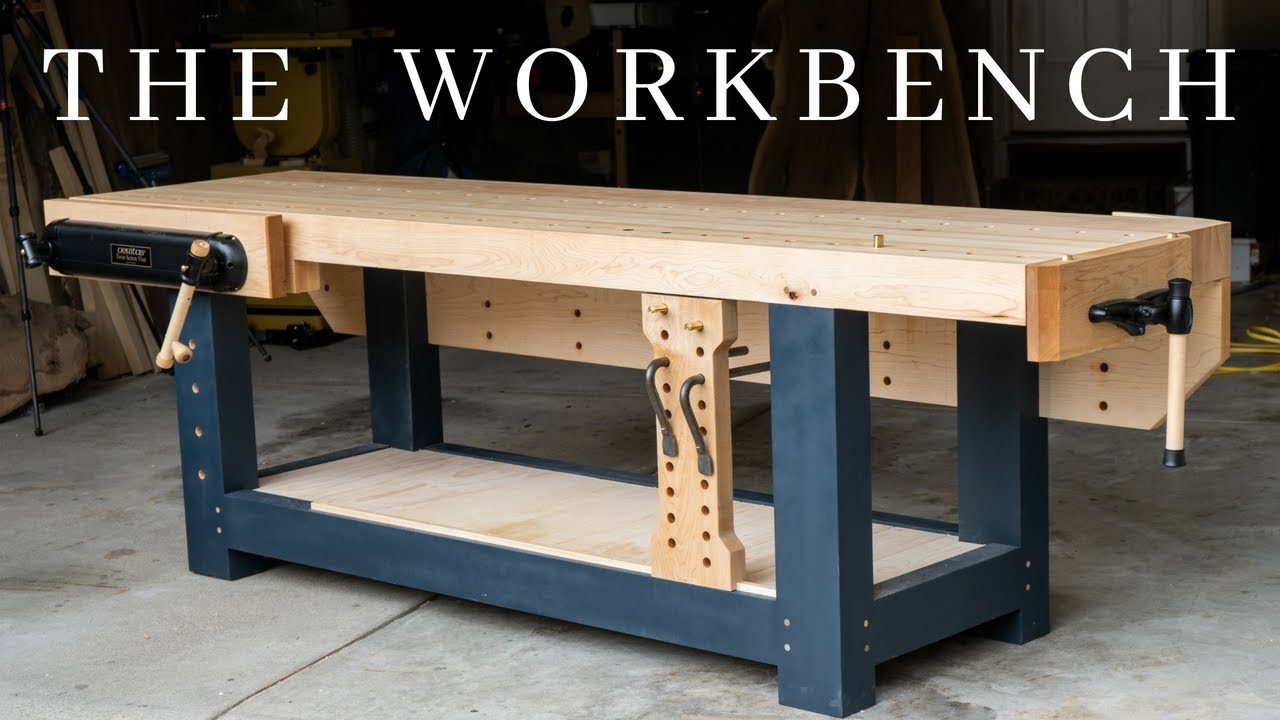
Choose the style. You can build a classic hardwood bench, a plywood torsion box, or a hybrid. Set a budget and timeline. If you are new, keep the design simple. This is key when you learn how to make a woodworking table with confidence.
Tools and Materials
Tools you will use
- Tape measure, pencil, and marking knife for layout
- Speed square and 24 to 48 inch level for checks
- Circular saw or table saw for cuts
- Miter saw for repeat cuts
- Drill or drill press for holes
- Impact driver for screws
- Router with flush trim and roundover bits
- Random orbit sander and sanding blocks
- Clamps, lots of them
- Safety gear for eyes, ears, and lungs
Materials for a strong, cost‑wise build
- Construction lumber for legs and stretchers
- 3 quarter inch plywood for shelves and torsion box skins
- Hardwood or MDF for the top layers
- Wood glue and quality wood screws
- Pocket hole screws if using pocket joinery
- Finish such as oil, varnish, or a wipe‑on poly blend
- Leveling feet and optional locking casters
Tip from the shop. When you decide how to make a woodworking table on a budget, use two layers of 3 quarter inch MDF with a hardboard sacrificial top. It is flat, cheap, and easy to refresh.
Cut List and Dimensions
Sample bench size. 72 inches long, 30 inches deep, 34 inches high.
Base
- Legs. Four pieces at 3 inches by 3 inches by 32 inches
- Long stretchers. Two pieces at 68 inches by 3 inches by 3 inches
- Short stretchers. Two pieces at 26 inches by 3 inches by 3 inches
- Lower shelf stretchers. Two pieces at 68 inches by 2.5 inches by 1.5 inches and two pieces at 26 inches by 2.5 inches by 1.5 inches
Top
- MDF or plywood core. Two sheets at 72 inches by 30 inches
- Hardwood edging. Two long at 72 inches by 1.5 inches by 1 inch and two short at 30 inches by 1.5 inches by 1 inch
- Optional hardboard skin. One sheet at 72 inches by 30 inches
Shelf
- Plywood. One sheet at 68 inches by 26 inches
This cut list supports a clean workflow while you learn how to make a woodworking table that is stable and square.
Step‑by‑Step: How to Make a Woodworking Table
- Mill and prep your stock
Joint and plane if you can. If not, choose straight boards at the store. Mark a reference face and edge on each piece. - Build the leg assemblies
Glue and screw or use mortise and tenon. Clamp each leg to a flat surface while the glue cures. Check each for square. - Add long and short stretchers
Dry fit first. Clamp, then fasten. Measure diagonals to confirm square. If diagonals match, the frame is square. - Install the lower shelf frame
Attach lower stretchers a few inches off the floor. This adds mass and stops racking. Drop in the plywood shelf later. - Fit leveling feet
Drill and install T‑nuts and feet. Level the frame on your floor. This step is key when you plan how to make a woodworking table that stays true over time. - Build the top core
Glue two MDF or plywood layers. Use many clamps or heavy weights. Use a few screws from the underside to act as clamps, then remove or leave them. - Add hardwood edging
Mill flush to the core using a router and flush trim bit. Round over the top edges slightly. This protects the edges from chips. - Flatten the top
Check with winding sticks or a long straightedge. If needed, use a router sled to surface it. Take light passes. The flatter the top, the better your joinery work. - Attach the top to the base
Center the base under the top. Fasten with elongated holes in the aprons to allow seasonal movement. Leave a tiny gap at the back for debris to fall, if you like. - Drill dog holes and vise mounts
Lay out a grid of 3 quarter inch holes, 4 to 6 inches apart. Use a drill guide for straight holes. Mount a face or end vise per the maker’s instructions. - Install the shelf
Drop in the plywood shelf. Secure it with a few screws. Add a lip if you want to keep bins from sliding. - Sand and finish
Sand to 180 or 220 grit. Wipe dust. Apply two to three coats of oil and wax, or a thin wipe‑on varnish. For a glue‑proof skin, add a hardboard sheet with a few screws so you can replace it.
At this point, you know how to make a woodworking table from start to finish. Take a slow lap around the bench. Check for wobble. If it shifts, adjust the leveling feet and tighten the stretchers.
Joinery Options Compared
Pocket holes
- Fast and simple for a first bench
- Works best with added glue blocks and thick stretchers
Mortise and tenon
- Classic, strong, and rigid under stress
- Needs more tools and time, but pays off long term
Dowels or loose tenons
- Good balance of speed and strength
- A dowel jig or a domino style tool helps with accuracy
Bolted knock‑down joints
- Great if you must move the bench
- Use threaded inserts or cross dowels for repeat assembly
Your choice affects how to make a woodworking table that fits your skills and your shop. Pick the level of complexity you can execute well.
Ensuring Flatness, Squareness, and Rigidity
Use winding sticks to spot twist. Place them at both ends of the top and sight across. Adjust with a router sled or hand planes.
Check base square by measuring corner to corner. Make the short diagonal longer by pushing the frame gently and re‑clamping. Repeat until both match.
Add mass and bracing to fight racking. A lower shelf full of tools helps. For mobile benches, use locking casters rated well above the total load. These habits define how to make a woodworking table that feels rock solid.

Surface Treatments and Durable Finishes
Choose a finish that matches your work. Oil and wax feel great and are easy to refresh. Varnish and wipe‑on poly resist spills and glue.
Sand in steps. 120, then 150, then 180 or 220. Break sharp edges. Keep the top slightly matte to avoid glare.
If you do lots of glue‑ups, use a replaceable hardboard skin. Replace it when it gets beat up. This is a smart trick when learning how to make a woodworking table you can maintain with little fuss.
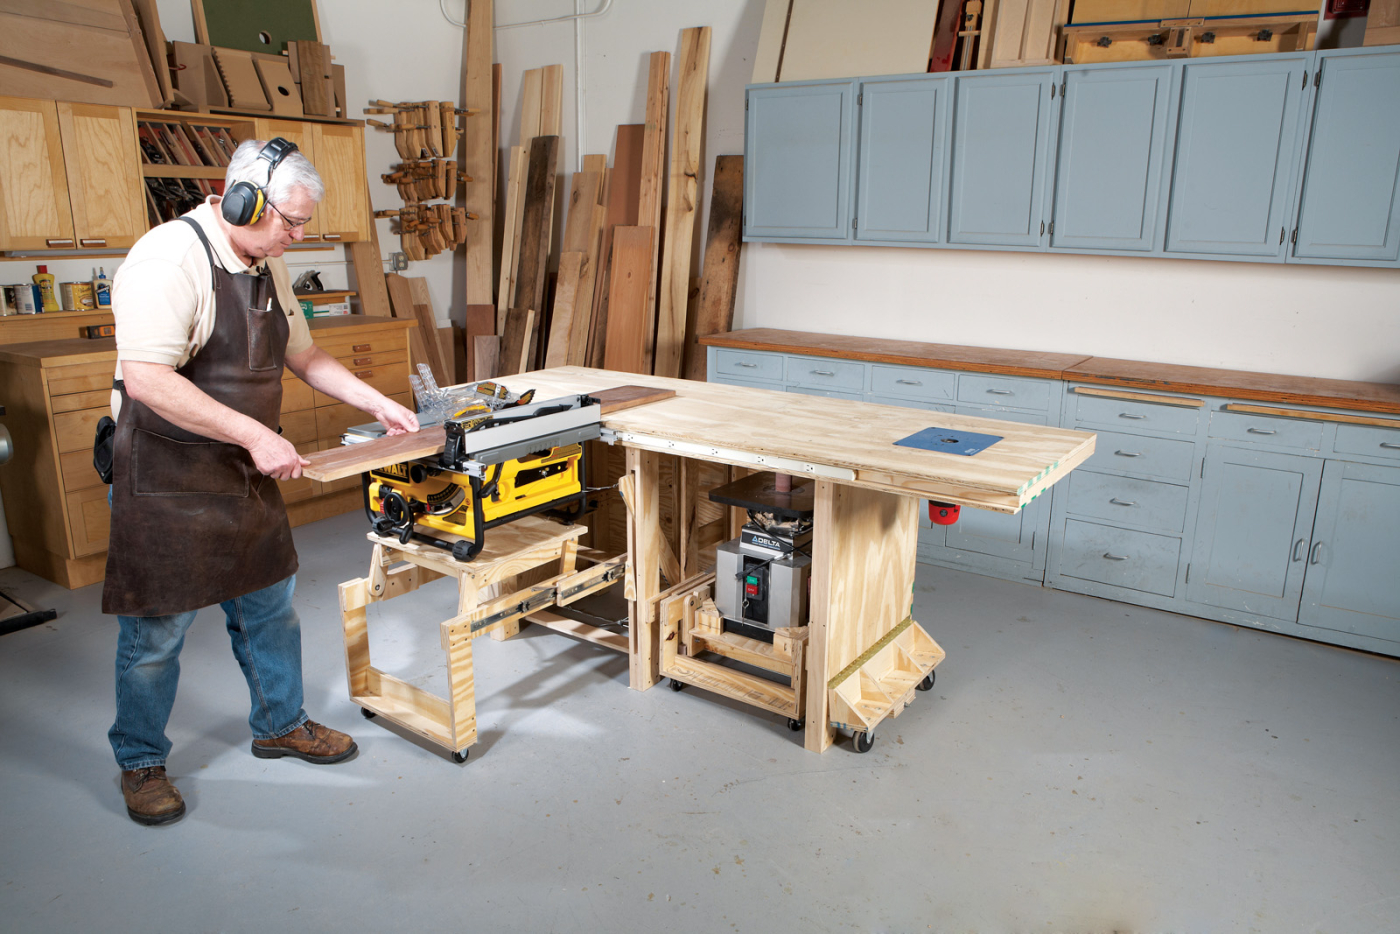
Safety, Ergonomics, and Dust Control
Wear eye and ear protection. Use a dust mask or respirator when you cut or sand. Keep cords clear of blades.
Set bench height to your body. A common guide is near your wrist crease with your arms at your sides. Test with scrap blocks before you cut your legs to length.
Add dust control. Even a shop vac with a fine filter helps. Good light reduces mistakes. These small steps shape how to make a woodworking table that protects your health.
Cost, Time, and Sourcing Tips
Budget builds with construction lumber and MDF can land under a few hundred dollars. Hardwood benches cost more but last decades. Buy materials during sales and check for store cuts to save time.
Expect a weekend for a simple build. A classic bench with mortise and tenon may take two to three weekends. Plan glue‑up sessions, then do small tasks while clamps work.
Check local yards for offcuts. Ask for straight boards. When you plan how to make a woodworking table for less, your best savings come from smart sourcing and simple joinery.
Common Mistakes and How to Avoid Them
Out‑of‑square base
- Always dry fit and measure diagonals
- Clamp across the longer diagonal to bring it in
Cupped or twisted top
- Store sheets flat and supported
- Use a router sled or add a torsion box core
Weak screw joints
- Pre‑drill and countersink
- Add glue blocks at key stress points
Wobbly legs
- Install leveling feet
- Add a lower shelf for mass
Dog holes not aligned
- Use a fence or a jig
- Mark a full grid before drilling
These fixes are core to how to make a woodworking table that behaves like pro shop gear.
Upgrades, Accessories, and Variations
Workholding
- Face vise, tail vise, quick‑release vise
- Holdfasts and bench dogs for fast clamping
Add‑ons
- T‑track for jigs and stops
- Tool well, power strip, and cable management
- Bench hooks and shooting board storage
Mobility and modular ideas
- Locking casters and fold‑down wings
- Knock‑down bolts for small spaces
- Torsion box top for extreme flatness
Each upgrade changes how to make a woodworking table that matches your style and space. Start simple, then add what you use most.
Maintenance and Long‑Term Care
Wipe spills right away. Re‑oil or wax the top a few times a year. If the surface gets beat up, sand light and refresh the finish.
Check bolts and screws twice a year. Tighten any that creep. If the top drifts out of flat, re‑flatten with a sled or replace the sacrificial skin.
Good care turns a weekend build into a tool that serves for years. This mindset is part of how to make a woodworking table you can trust every day.
Frequently Asked Questions of how to make a woodworking table
What is the best height for a woodworking table?
Most people like 32 to 36 inches for general work. Go lower for heavy planing, and higher for fine joinery or carving.
Which wood is best for the benchtop?
MDF is flat and cheap, hardwood is tough and classic. Many use an MDF core with hardwood edging for a good balance.
Do I need a vise right away?
No. You can add a vise later. Start with clamps, bench dogs, and a planing stop, then choose a vise that fits your work.
How do I keep the top flat over time?
Support the top with a rigid base and seal all sides. Use a router sled to flatten if needed, and keep the shop humidity stable.
Can I build it with basic tools?
Yes. A circular saw, drill, sander, and clamps are enough. Take your time with layout, and use guides for straight cuts.
Should I attach the top with glue or screws?
Use screws in slotted holes to allow movement. Avoid glue across the width so the top can expand and contract.
How many dog holes do I need?
A grid with 4 to 6 inch spacing covers most work. Start with a few rows and add more as you learn your clamping needs.
Conclusion
You now know how to make a woodworking table that is flat, strong, and tuned to your work. Plan the size, build a rigid base, make a stable top, and finish for easy care. Add features as you grow.
Pick a weekend, gather your tools, and start the first cuts. Every pass you make builds skill and confidence. Share your build, ask questions, and subscribe for more step‑by‑step shop projects.