

Build a stable base, add level wings, align the fence, and secure the saw.
You’re about to learn how to make a miter saw table that is safe, square, and built to last. I have built many versions in small garages and busy shops. I will guide you step by step.
You will see plans, sizes, tools, and pro tips. If you want a clear plan for how to make a miter saw table, you are in the right place.
What a Miter Saw Table Does and Why Build One?
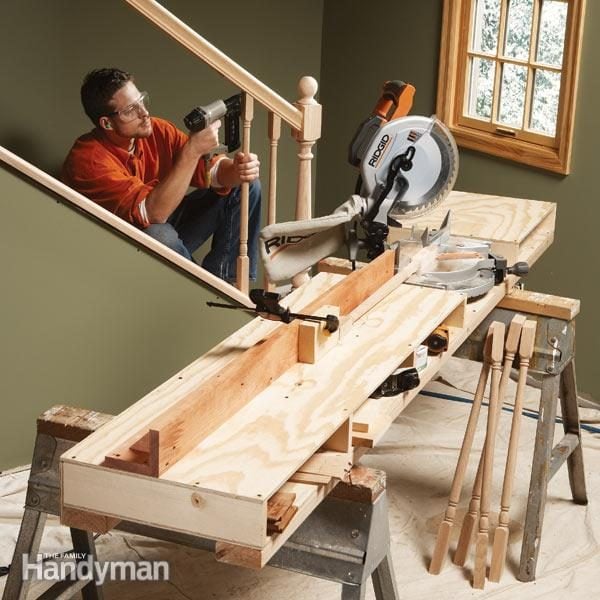
A miter saw table supports long boards. It keeps the saw stable. It boosts accuracy and safety. It also speeds up repeat cuts. With the right fence and stop, your work gets clean and fast.
You can buy stands, but a custom bench fits your space. It can hold dust, tools, and clamps. It can be fixed or mobile. You choose the size and parts. This guide shows how to make a miter saw table that fits your needs.
Tools and Materials Checklist
Gather your tools first. This keeps the build smooth and safe.
Tools you will need:
- Circular saw or table saw for cutting sheet goods
- Drill and driver for holes and screws
- Pocket hole jig or countersink bit
- Measuring tape, square, and level
- Clamps and a straightedge
- Router with a straight bit for T-track grooves
- Random orbit sander
Materials to consider:
- 3/4-inch plywood or MDF for top and shelves
- 2×4 or 2×3 lumber for the frame
- Construction screws and wood glue
- Adjustable feet or locking casters
- T-track, knobs, bolts, and a stop block
- 1×4 or 1×3 boards for the fence face
- Polyurethane or water-based finish
- Dust port, hose, and sheet material for a shroud
This list works for most builds. You can scale up or down. Use it as a base checklist for how to make a miter saw table.
Planning and Dimensions
Good planning saves time. It also saves rework. Measure your saw first. Note the height of the saw’s deck from your bench.
Key sizes and tips:
- Bench height: 34 to 36 inches suits most people. Pick what matches your body.
- Saw bay width: Leave at least 2 inches gap on each side of the saw base.
- Top depth: 24 inches fits most shops. Go 30 inches if you handle very wide stock.
- Wing length: 36 to 60 inches per side supports long boards. Plan for your common cuts.
- Fence height: 3 to 4 inches is easy to see and clamp.
- Saw deck flush: The wing tops must be level with the saw deck. This is vital.
Sketch the layout before you cut wood. Add storage below if you want. If space is tight, make a mobile stand. This step is key in how to make a miter saw table that is smart and safe.
Step-by-Step Build Instructions
Follow these steps in order. Measure twice. Cut once. Keep parts square.
- Build the base
- Cut 2x4s for the frame. Make a rectangle with cross braces.
- Add legs at each corner. Use glue and screws.
- Add a lower shelf frame for strength and storage.
- Add leveling feet or casters. Locking casters keep the bench from rolling.
- Install the top and saw bay
- Cut the main top from 3/4-inch plywood or MDF.
- Mark the saw bay. Keep it centered or offset for wall space.
- Cut the bay opening so the saw base sits flat on the frame.
- Secure the top to the frame. Leave the bay open for the saw.
- Set saw height and wing shims
- Place the saw in the bay. Measure the saw deck height.
- Cut two wing panels from the same material as the top.
- Shim the wings so they sit flush with the saw deck. Use cards, tape, or thin ply.
- Screw the wings down once they are level.
- Build the fence
- Use straight plywood or hardwood strips. Make a fence about 3 to 4 inches tall.
- Mount the fence so it is square to the saw blade. Check with a square.
- Leave a small gap at the saw kerf. This reduces tear-out when you cut.
- Add T-track and a stop block
- Route a groove along the fence or the top. Fit the T-track flush.
- Make or buy a stop block that rides in the track.
- Test repeat cuts. Adjust the stop to get exact lengths.
- Add shelves and doors if desired
- Fit a lower shelf. Add bins for offcuts and hardware.
- Add side cubbies for blades and tools. Keep it tidy and safe.
By now you know how to make a miter saw table from frame to fence. Take your time on the flush setup. That step matters most.
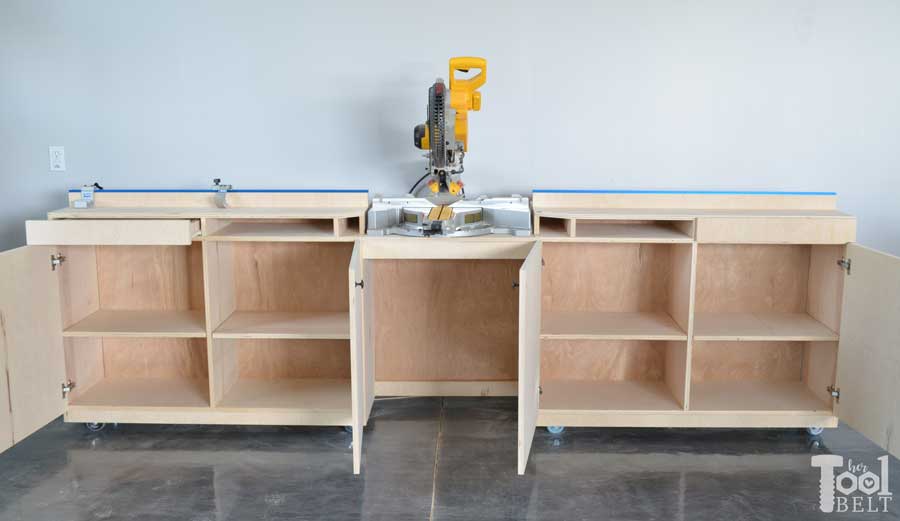
Building Level Extensions and a Reliable Stop System
Level wings are the heart of the table. If they sag, your cuts will be off. I learned this the hard way on my first build. The fix is simple. Use stout support and check often.
Steps and checks:
- Use 3/4-inch material for wings. Add braces below each wing.
- Run a straightedge across the saw deck and wings. Check edge to edge.
- Add an L-shaped fence. Screw it in elongated holes. This lets you fine tune it.
- Add a clear tape measure on the fence. Zero it at the blade kerf.
- Use a flip stop or a T-track stop. Make sure it locks tight without wiggle.
Do a test run with scrap. Crosscut a 1×4. Check length and square. Adjust as needed. This is a key part of how to make a miter saw table that stays accurate.

Dust Collection and Power Management
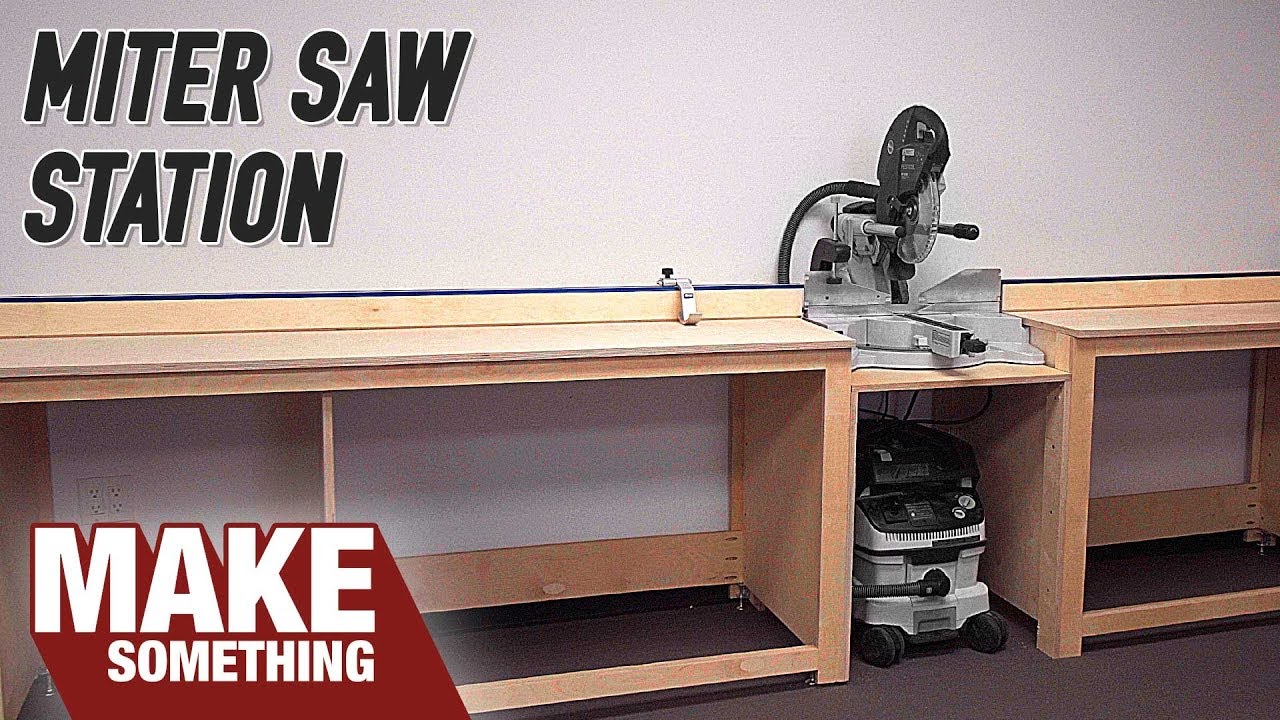
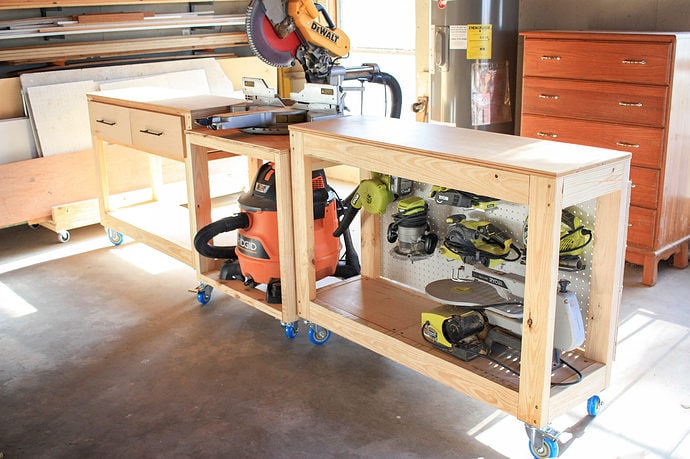
A good dust setup keeps you healthy. It also keeps your line clean. A small shroud behind the saw helps a lot.
Dust tips:
- Build a box behind the saw. Angle the sides to funnel dust.
- Add a 2.5-inch or 4-inch dust port. Match your shop vac or dust collector.
- Seal gaps with foam tape. More airflow goes where you want it.
- Use a high-efficiency bag or filter on the vac. It traps fine dust.
Power tips:
- Mount a recessed power strip on the side.
- Use a paddle switch or remote switch for the saw. It is safer and fast to reach.
- Manage cords with clips. Keep them clear of the blade and fence.
These steps add safety and comfort. They also show care in how to make a miter saw table for daily use.
Safety, Accuracy, and Common Mistakes
Safety comes first. Accurate cuts come next. Treat the saw with respect.
Best practices:
- Keep hands away from the blade. Use clamps for small parts.
- Let the blade reach full speed before cutting. Lift the blade after it stops.
- Check the blade for sharpness. Dull blades wander and burn.
- Wear eye, ear, and dust protection. Keep the area bright and clean.
Common mistakes to avoid:
- Uneven wings. This causes drop at the cut. Shim until flush.
- Fence not square. Check with a quality square and adjust.
- No relief at the kerf. Add a small fence gap to reduce chip-out.
- Weak frame. Add braces. A stiff base means repeatable cuts.
In my shop, I once rushed the fence and had bad miters all day. A five-minute tune fixed the issue. That is why I stress careful setup when you learn how to make a miter saw table.
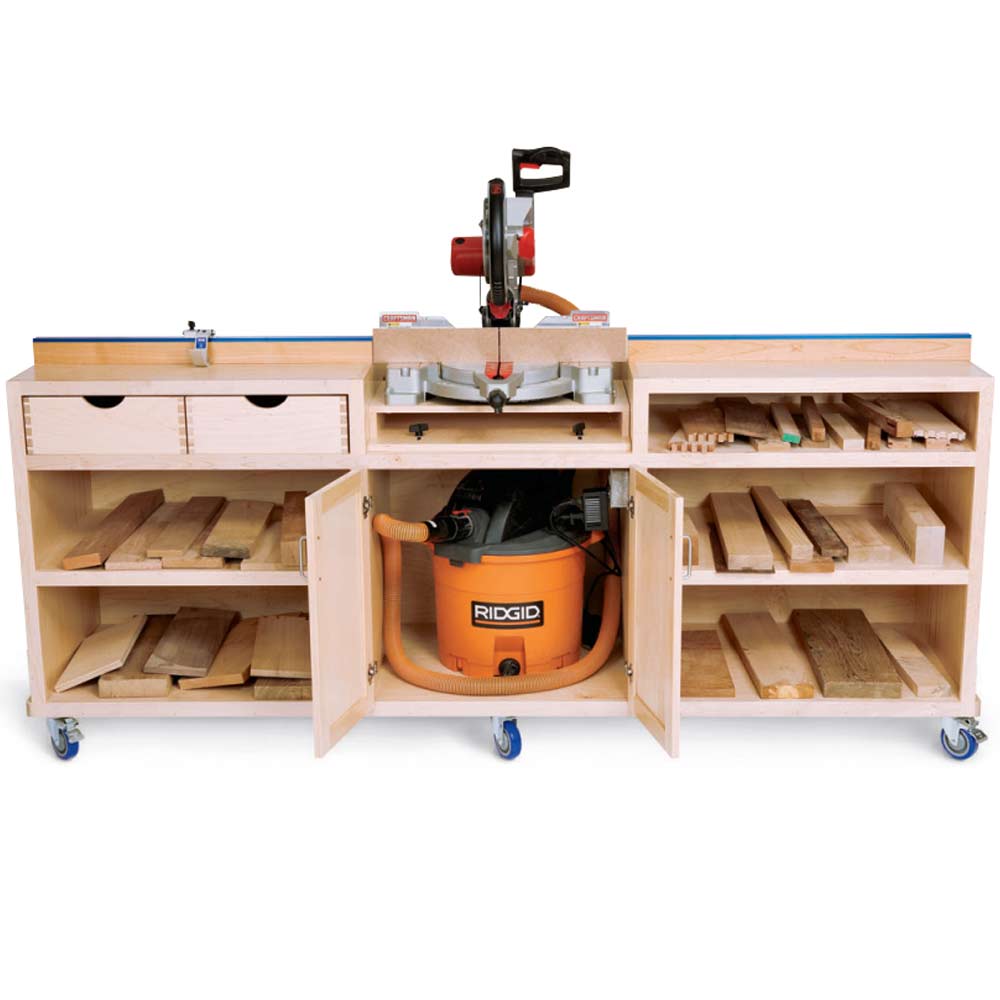
Finishing, Upgrades, and Maintenance
A good finish helps the wood glide. It also resists glue and stains.
Finish and care:
- Seal MDF or plywood with two coats of water-based polyurethane.
- Wax the top with paste wax. Boards slide better and do not snag.
- Vacuum dust from the shroud and shelves each week.
- Check bolts and screws every month. Tighten if needed.
Useful upgrades:
- Add hold-down clamps along the fence.
- Add a second T-track along the top for jigs.
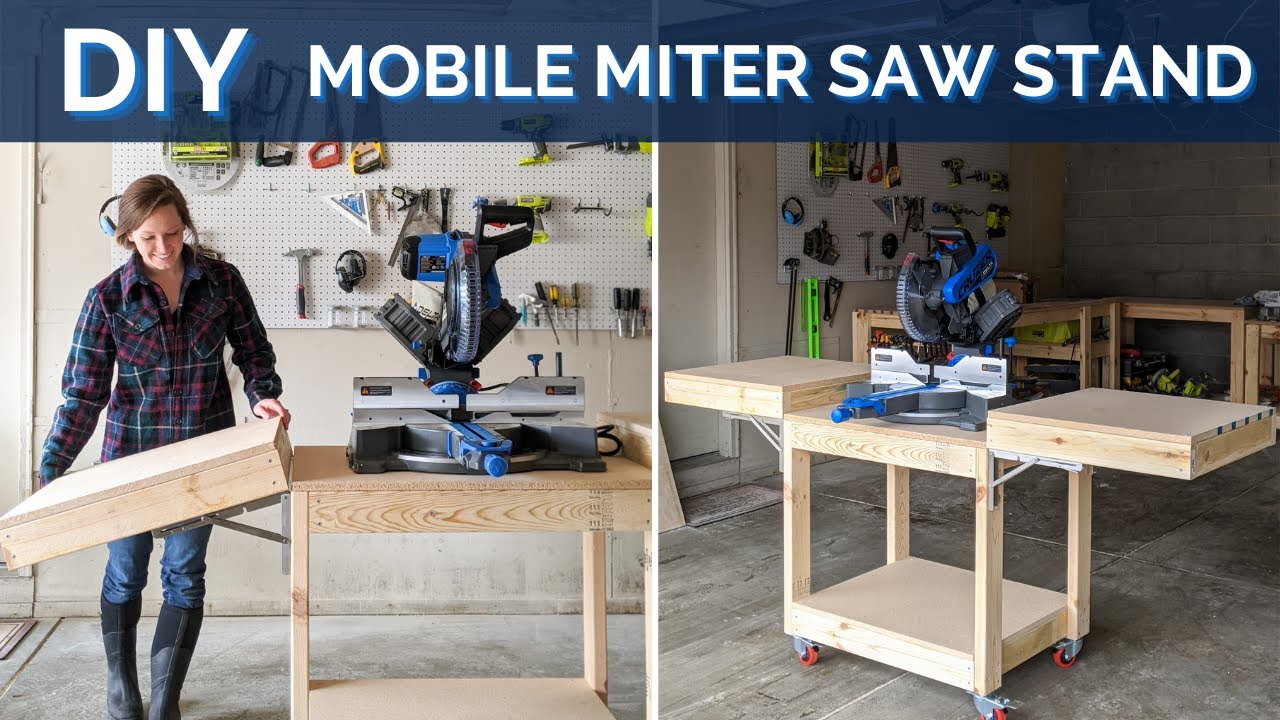
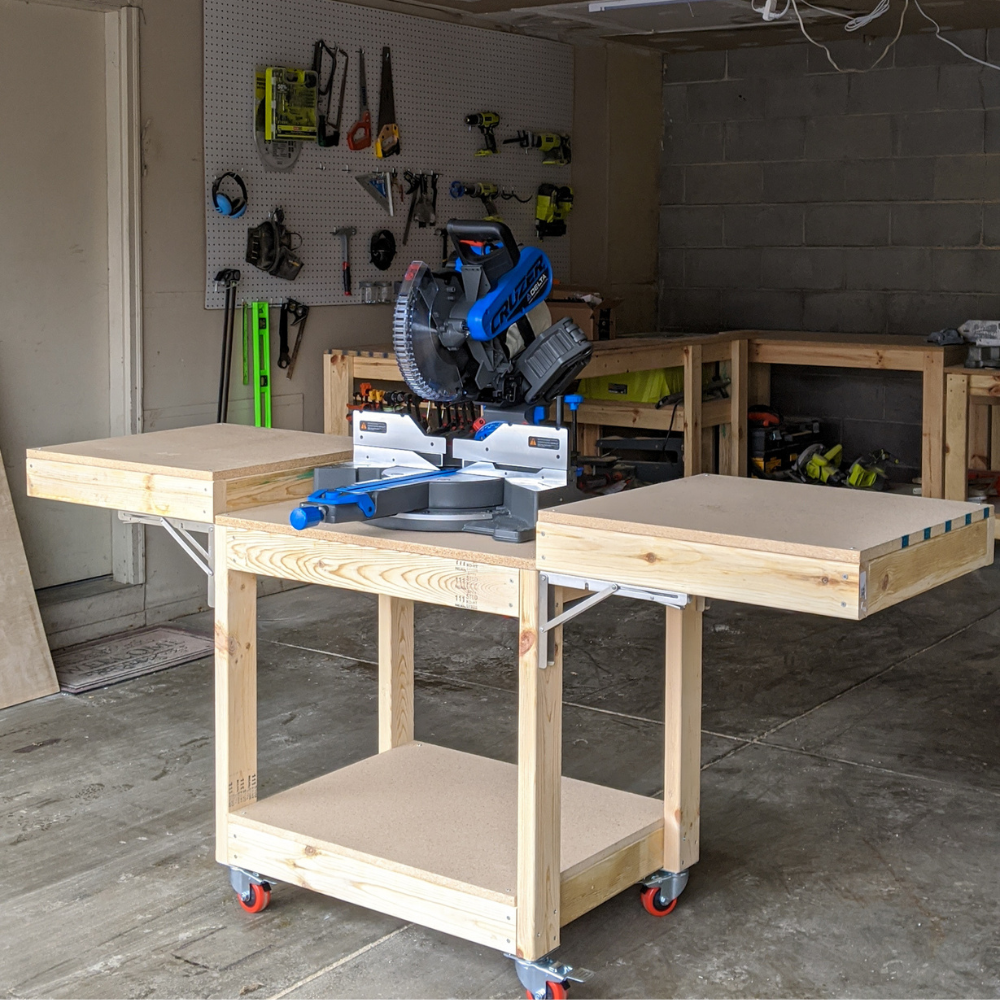
- Add fold-down wings if space is tight.
- Add storage for blades, jigs, and a square.
These touches improve the bench. They also show you know how to make a miter saw table that grows with your skills.
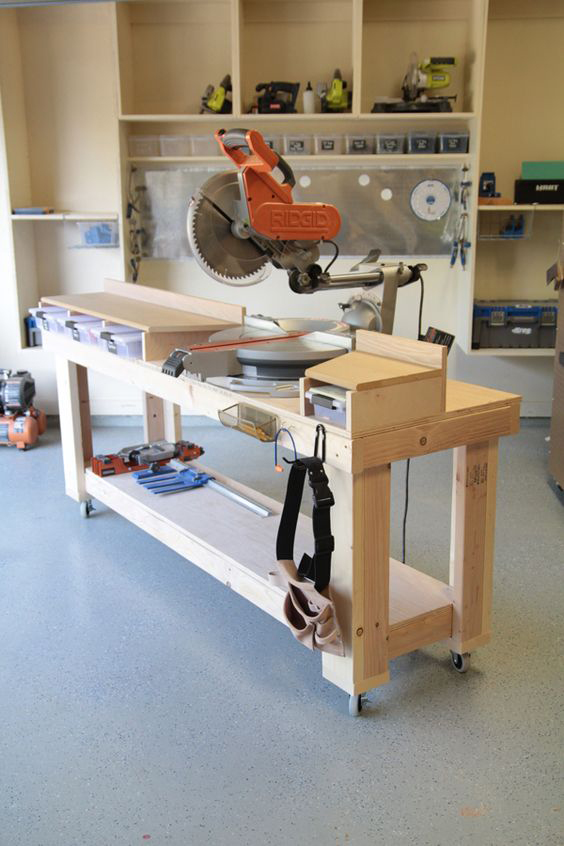
Cost, Time, and Cut List Example
Budget matters. Time matters too. Here is a simple guide.
Typical cost:
- Basic build with plywood, screws, and feet: 120 to 250 dollars
- Add T-track, casters, finish, and dust parts: 80 to 200 dollars more
Time to build:
- Cutting and frame: 2 to 3 hours
- Top, wings, fence, and T-track: 2 to 4 hours
- Dust, finish, and fine tuning: 2 to 3 hours
Sample cut list for a mid-size bench:
- Top: 24 by 72 inches, 3/4-inch sheet
- Left wing: 16 by 36 inches, 3/4-inch sheet
- Right wing: 16 by 36 inches, 3/4-inch sheet
- Fence face: 3 by 70 inches, two layers laminated
- Frame: 2x4s cut to fit your layout
Use this as a guide only. Your saw and space may need tweaks. Plan first, then cut. This helps a lot when you map how to make a miter saw table that fits your shop.
Frequently Asked Questions of how to make a miter saw table
What height should my miter saw table be?
Most people like 34 to 36 inches. Pick a height that keeps your elbow just above the saw handle.
How do I keep the wings level with the saw?
Shim the wings until they are flush with the saw deck. Use a long straightedge and check the full length.
Do I need T-track and a stop block?
No, but they help a lot with repeat cuts. A stop block saves time and boosts accuracy.
What material is best for the top?
3/4-inch plywood is strong and stable. MDF is flat and smooth but needs sealing to resist moisture.
Can I make it mobile?
Yes, add locking casters rated for the total weight. Make sure the locks hold firm during cuts.
How much does it cost to build?
Most builds cost 120 to 450 dollars. It depends on size, hardware, and dust parts.
How to make a miter saw table for a small shop?
Use a narrow depth and fold-down wings. Add casters so you can roll it against a wall.
How do I align the fence with the blade?
Make a test cut, mark the line, and set the fence to that line with a square. Use elongated holes to fine tune.
How to make a miter saw table that handles long boards?
Build long wings with solid braces. Add a flip stop and hold-down clamps to keep boards steady.
How do I control dust on this setup?
Use a shroud with a 2.5 or 4-inch port. Seal gaps and connect to a shop vac or dust collector.
Conclusion
You now have a clear plan to build a sturdy, accurate bench. You saw how to make a miter saw table from the frame to the fence and dust. Keep the wings flush. Keep the fence square. Add a stop and you are set for repeat cuts.
Take one weekend and build it. Tune it with care. Then enjoy clean, fast, and safe work. If this helped, subscribe, share your build, or ask a question so we can improve it together.