
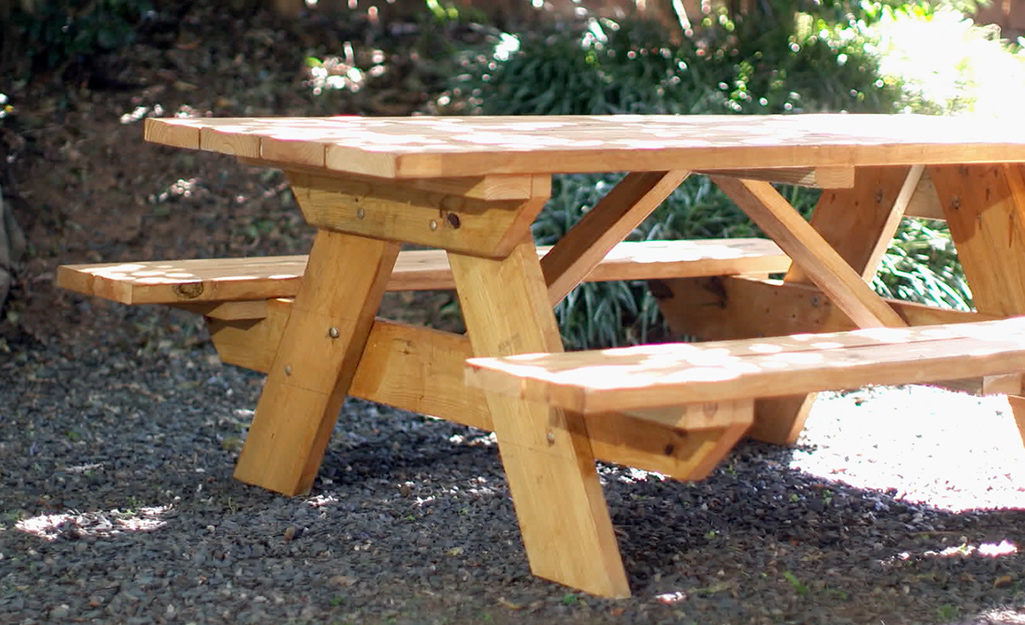
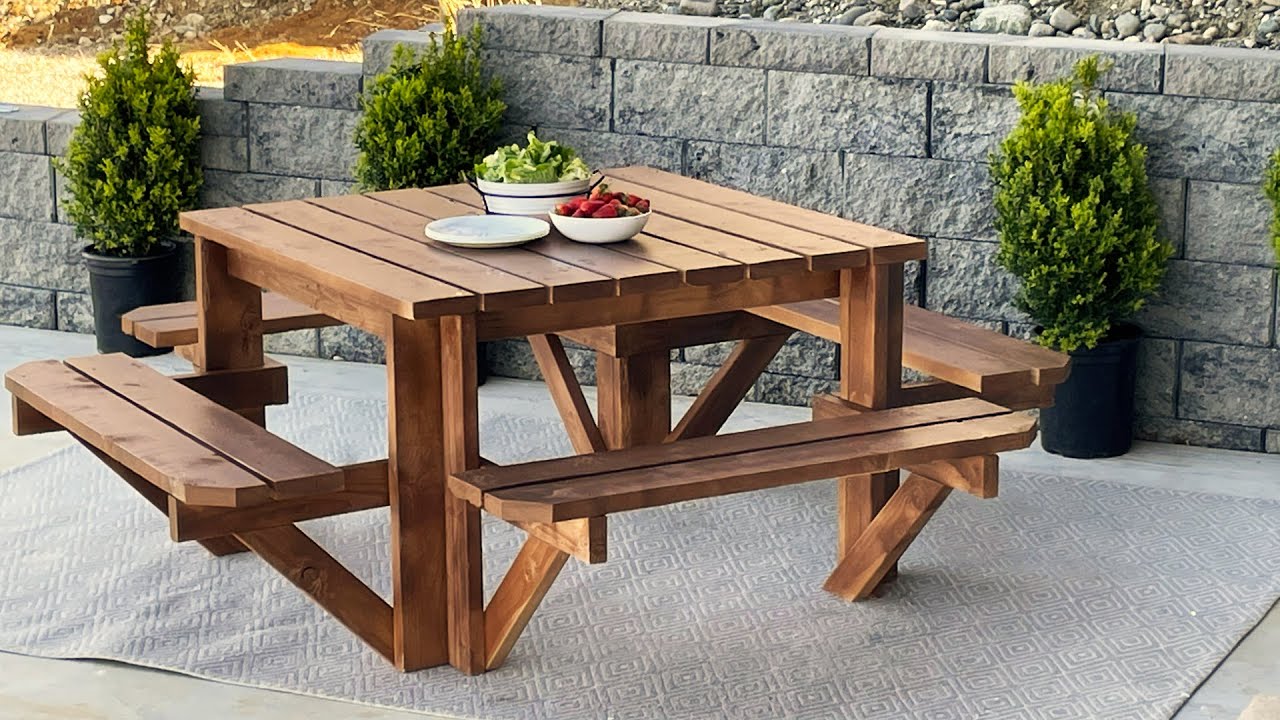
Build a sturdy picnic table using 2x lumber, basic tools, and weatherproof finish.
If you want to learn how to make a wooden picnic table, you are in the right place. I have built many tables for backyards, parks, and schools, and I will show you a proven plan.
This guide breaks down every step so you can build with skill, speed, and safety. By the end, you will know how to make a wooden picnic table that looks great and lasts for years.
What You Will Need: Tools and Materials
Gathering the right tools and wood is step one. It saves time and avoids mistakes.
Tools
- Tape measure, carpenter’s pencil, and square. These keep cuts straight.
- Circular saw or miter saw. A sharp blade gives clean cuts.
- Drill/driver with bits and countersink. Pre-drill to prevent splits.
- Orbital sander. Use 80, then 120 grit for smooth edges.
- Clamps. They hold parts tight while you fasten.
- Safety gear. Use glasses, ear protection, and a dust mask.
Materials
- Lumber. 2×6 and 2×4 construction lumber or cedar. Choose straight boards.
- Exterior screws. Use coated or stainless. 2.5 inch and 3 inch sizes.
- Exterior wood glue. Good for joints that see stress.
- Exterior finish. Use penetrating oil, spar urethane, or deck stain.
- Washers and carriage bolts if you prefer bolted legs. Optional but strong.
Tip from the shop: Buy one extra board. Use it to replace any piece with a bad knot or twist.
Choose a Size and Plan the Design
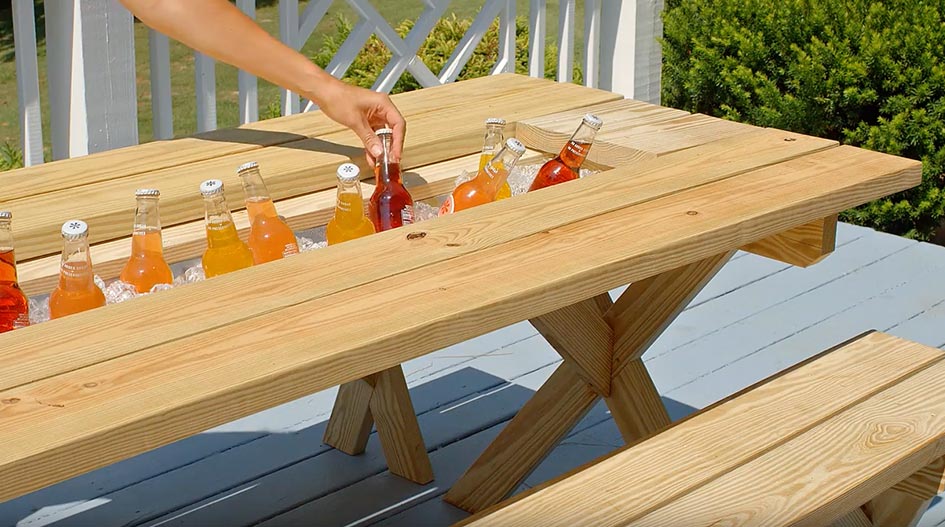
Decide how big you need the table to be before you cut. A classic size is 6 feet long. That seats six adults with room for plates and bowls.
Standard dimensions
- Tabletop: 72 inches long and about 30 to 34 inches wide.
- Seat height: 17 to 19 inches from the ground. This is a comfort range.
- Table height: 28 to 30 inches. This works well for most people.
- Bench depth: About 9 to 11 inches. Keep it simple and comfortable.
Why this matters
- These sizes match common ergonomic guides for outdoor seating.
- The table will feel stable and natural to use.
- It keeps knees clear when people slide in and out.
If your goal is how to make a wooden picnic table for kids, scale the height down by about 25 percent. For tight yards, a 5 foot length still seats four adults.

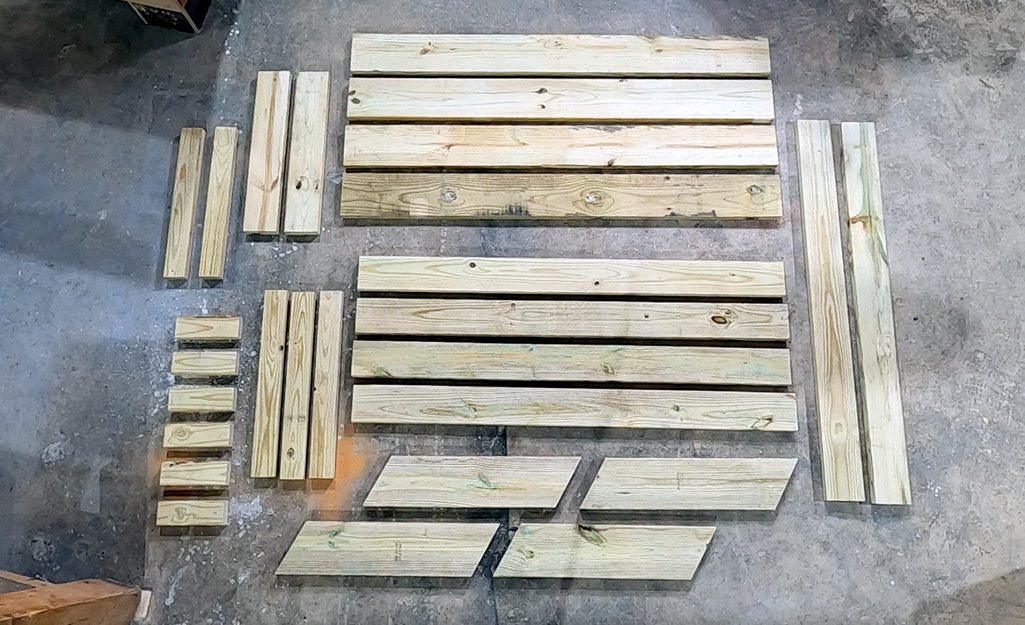
Cut List and Lumber Prep
Here is a typical cut list for a 6 foot table using 2x lumber. Adjust to fit your plan.
Tabletop
- Five 2×6 boards at 72 inches long for the top.
- Two 2×4 cleats at 28 inches for under the top.
Seats
- Four 2×6 boards at 72 inches long for the seats.
Legs and supports
- Four legs from 2×6, cut at 32 inches with 60 degree ends.
- Two seat supports from 2×6 at 60 inches.
- One center stretcher from 2×4 at 60 inches.
- Two diagonal braces from 2×4 at about 24 to 28 inches. Trim to fit.
Prep steps
- Check each board for crown and cup. Face the crown up.
- Mark all parts with a pencil and clear labels.
- Sand ends after each cut. Ease sharp corners to prevent splinters.
These steps make how to make a wooden picnic table faster and cleaner. Small prep moves lead to pro results.
Step-by-Step: How to Make a Wooden Picnic Table
Follow this build order. It keeps parts square and reduces rework.
- Build the tabletop
– Lay five 2×6 boards face down on a flat surface. Leave 1/4 inch gaps for drainage.
- Square the ends with a straight edge.
- Add two 2×4 cleats under the top, 10 inches in from each end.
- Clamp, pre-drill, and screw through the cleats into each top board.
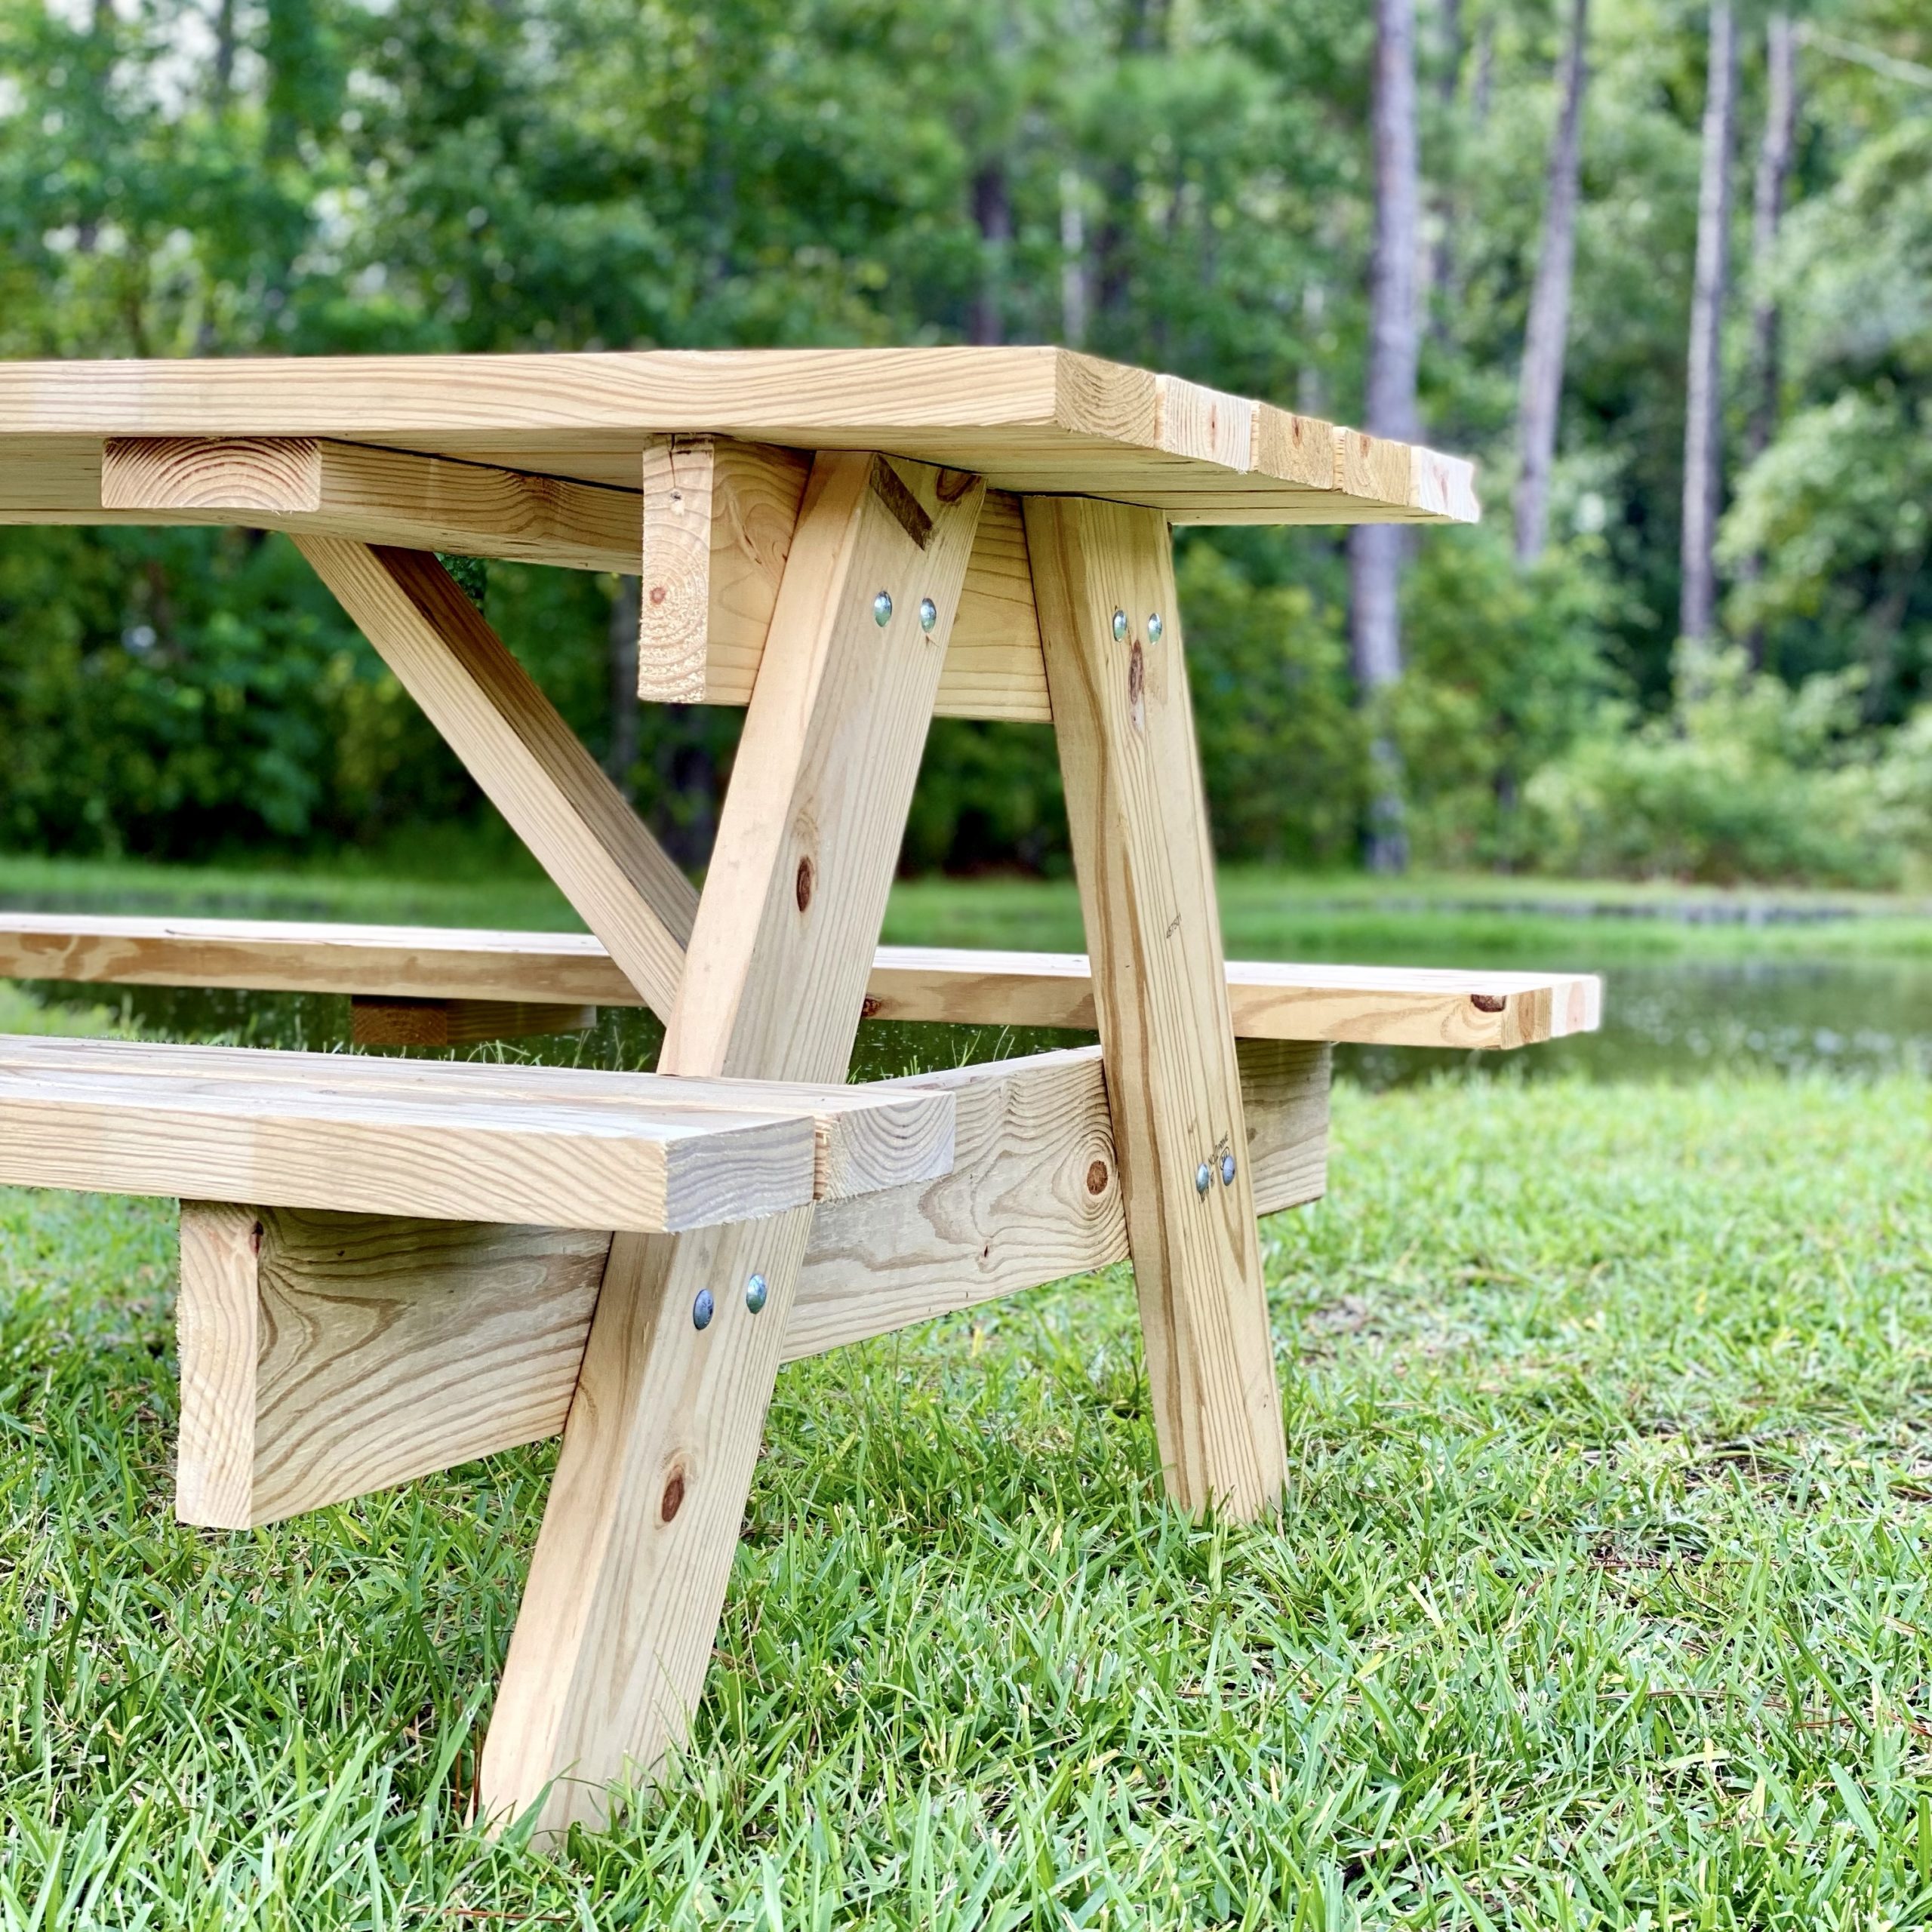
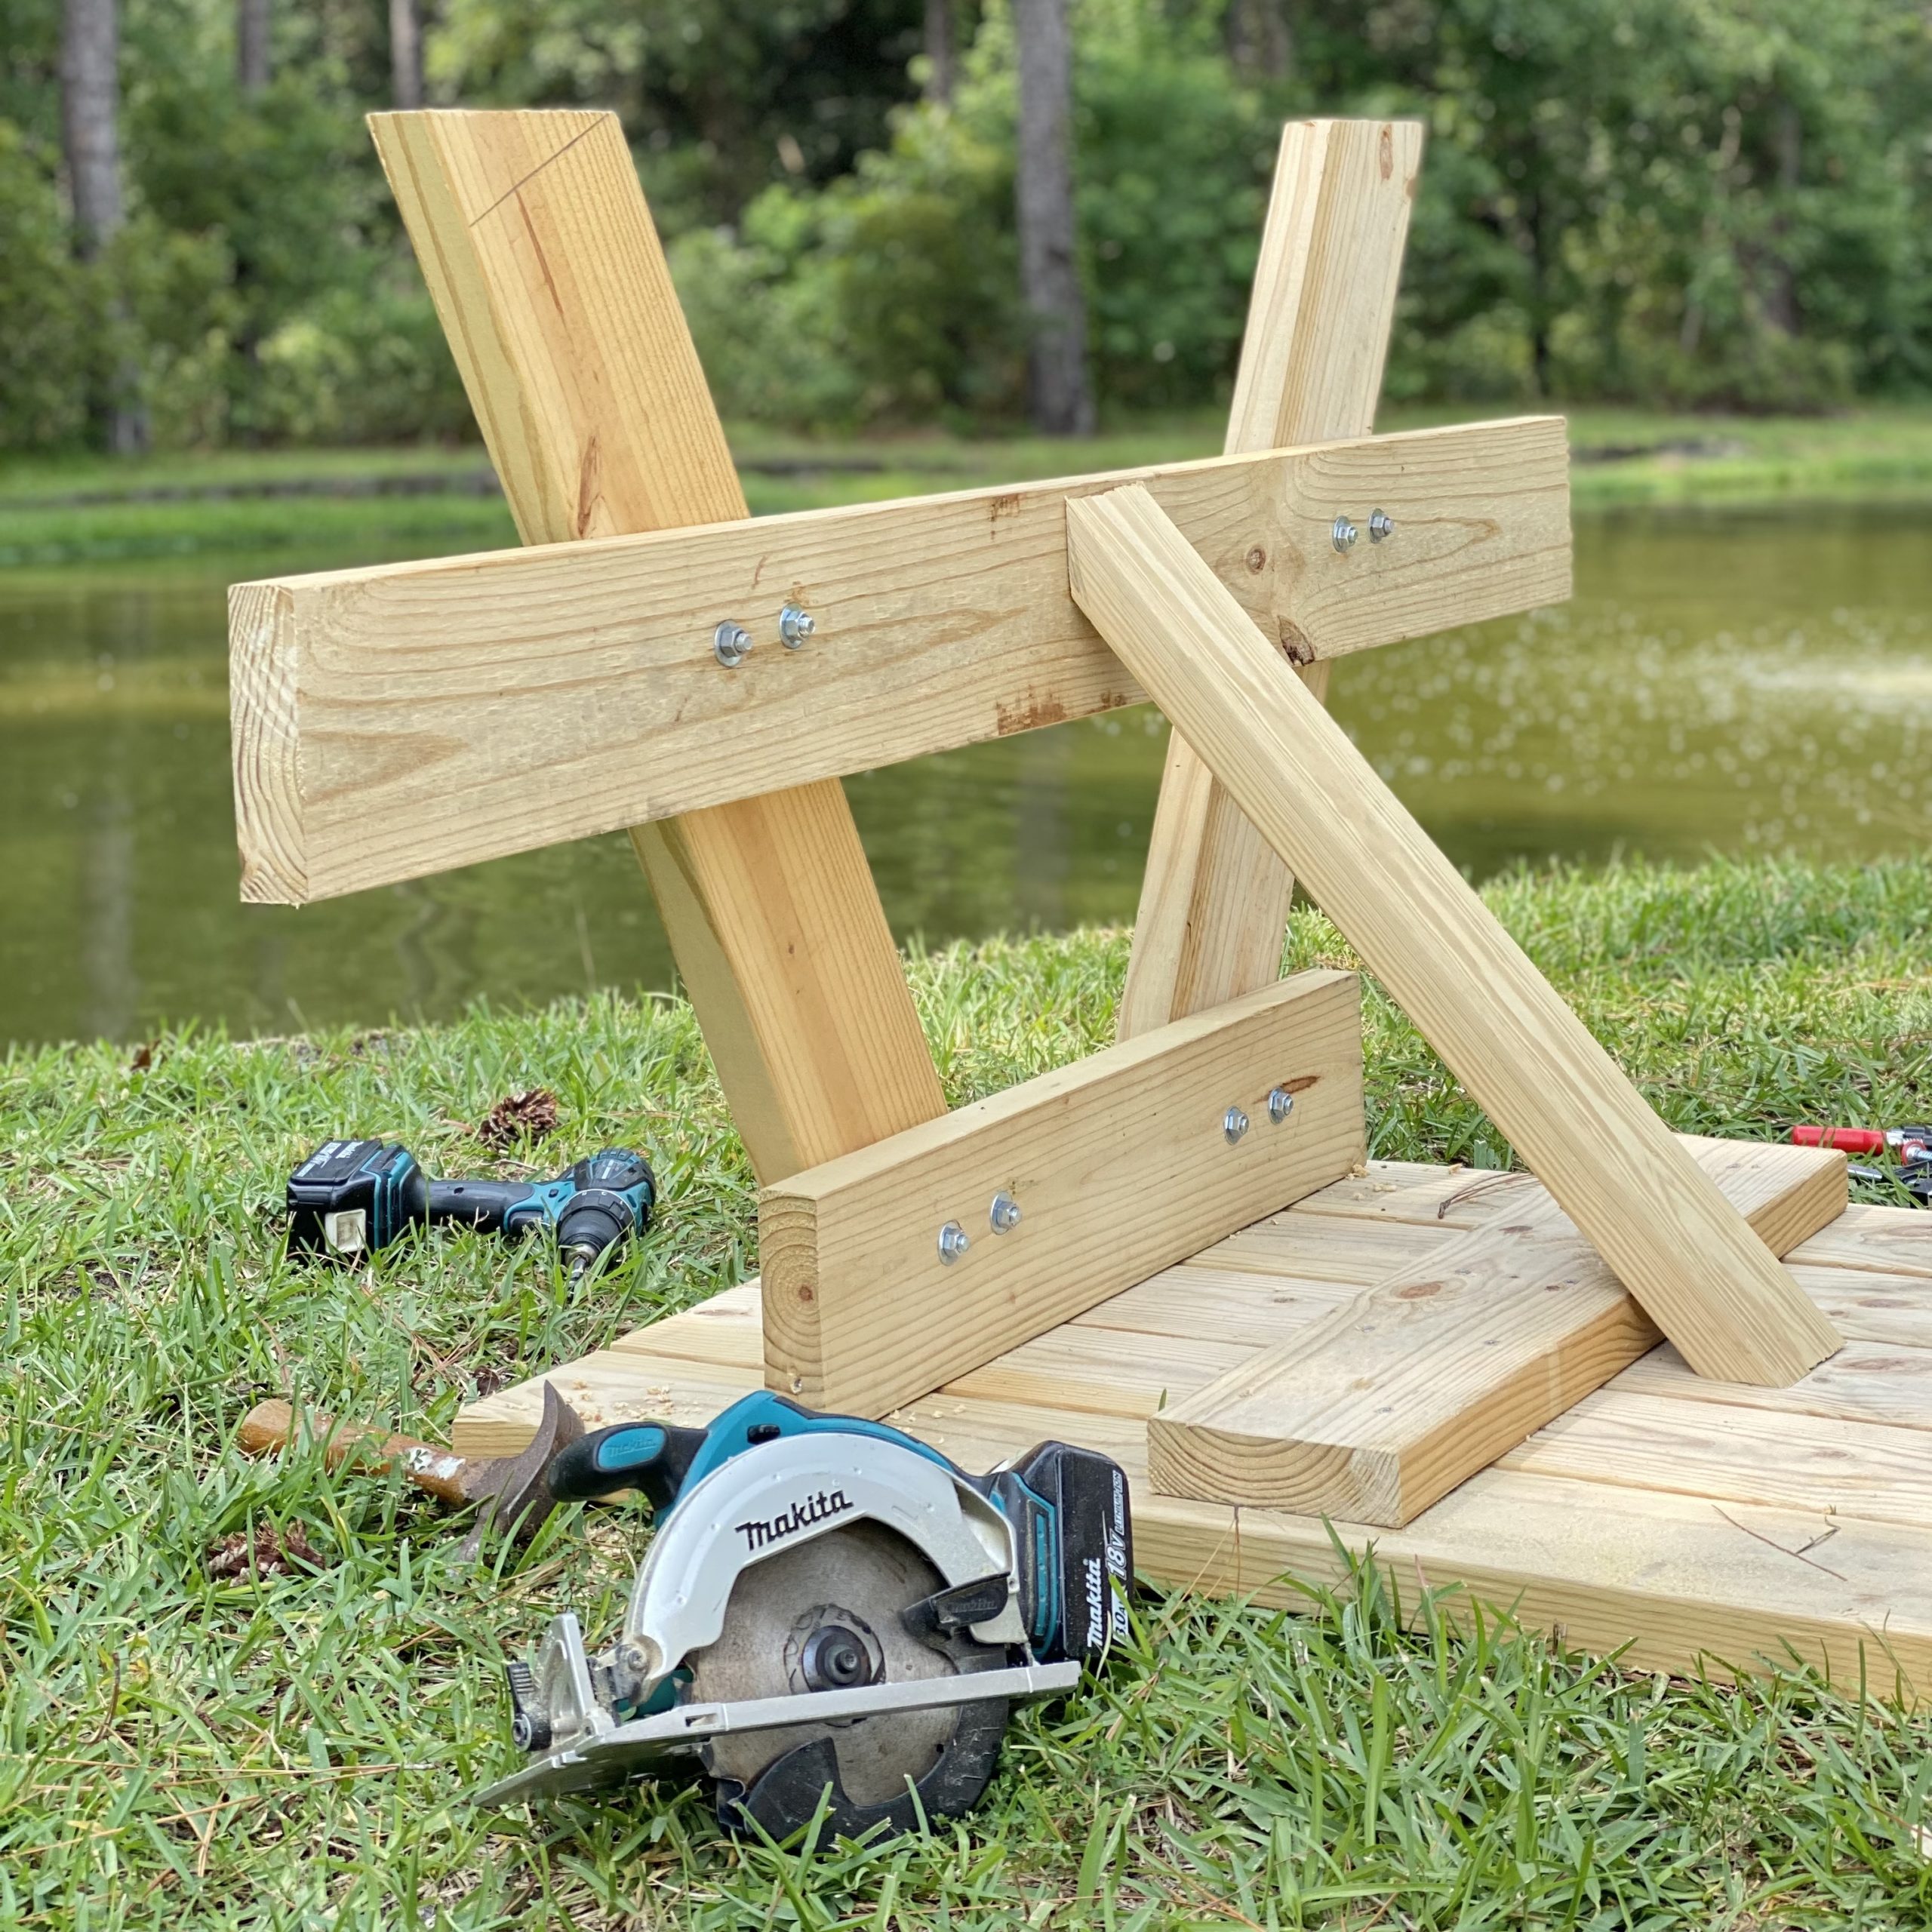
- Make the legs
- Cut four legs from 2×6 at 32 inches with 60 degree miters on both ends.
- The angle lets the legs splay for stability.
- Mark pairs so each end matches left and right.
- Add seat supports
- Cut two 2×6 supports at 60 inches.
- Attach a pair of legs to each support, about 12 inches from each end.
- Keep the seat support level to the ground. Use a square.
- Join the base to the top
- Set the tabletop upside down. Place each leg assembly under it.
- Center the base relative to the top.
- Fasten the seat supports to the tabletop cleats with screws or bolts.
- Add the center stretcher
- Run a 2×4 stretcher between leg assemblies. Place it about halfway up the legs.
- Pre-drill and screw into each leg set. This stops racking.
- Install seats
- Place two 2×6 seat boards on each side. Leave a 1/4 inch gap.
- Overhang the seat boards 1 inch past the ends. It looks clean and drains well.
- Pre-drill and screw down to the seat supports.
- Fit diagonal braces
- Cut two 2×4 braces to fit from the legs up to the tabletop cleats.
- Fit them snug. Pre-drill and screw both ends.
- Braces stop wobble and add long-term strength.
- Sand and ease edges
- Round off all edges with 120 grit.
- Focus on the seat fronts and table rim. Smooth wood feels better and resists chipping.
- Finish for weather
- Wipe dust. Apply exterior oil or spar urethane.
- Two or three thin coats beat one thick coat.
- Let it cure per the label. Keep it dry while it cures.
This is the core of how to make a wooden picnic table that holds up to real use.

Joinery, Fasteners, and Structural Tips
Good fasteners make the table last. Use exterior rated screws or bolts.
Best practices
- Pre-drill and countersink. This prevents splits and raised screw heads.
- Use coated deck screws or stainless near the coast.
- Bolts with washers at the legs add strength. Tighten after the first week.
Angles and layout
- A 60 degree leg angle is a common choice. It resists side loads.
- Keep seat supports level. Check both sides with a small level.
- Add braces if the ground is uneven or soil is soft.
I learned one hard lesson on how to make a wooden picnic table. Do not skip cross bracing. One early build wobbled for years until I retrofitted braces.

Sanding, Finishing, and Weatherproofing
Finish is your first defense against rain and sun. Choose a product that fits your climate.
Finishes that work
- Penetrating deck oil. Simple upkeep. Good for dry or hot areas.
- Spar urethane. Tough and glossy. Recoat every 1 to 2 years.
- Semi-transparent stain. Adds color and UV defense.
Steps that matter
- Sand to 120 grit. Wipe dust with a tack cloth.
- Seal end grain. It drinks water first. Extra coats here help a lot.
- Keep gaps for drainage. Water must escape to prevent rot.
These moves are key in how to make a wooden picnic table that resists weather and wear.
Safety, Durability, and Maintenance
Safety comes first during the build and after.
Build safe
- Use eye and ear protection. Keep fingers clear of blades.
- Clamp work before cutting. It keeps the saw from binding.
- Lift with help. A 6 foot table is heavy.
Use safe
- Round edges. This prevents snags and scrapes.
- Check fasteners each spring. Tighten any that loosen.
- Recoat finish when water no longer beads. This extends the life of the wood.
For families, how to make a wooden picnic table safe also means seat height and clear walkways. Leave room around the table so kids can move without tripping.
Budget, Timeline, and Common Mistakes
Know what to expect before you start. It helps you plan well.
Typical cost and time
- Cost: 120 to 350 dollars for construction lumber and finish.
- Time: 6 to 8 hours for one person, plus dry time.
- Two people can cut the build time in half.
Common mistakes to avoid
- Skipping pre-drill. This causes splits and weak joints.
- No drainage gaps. Water will pool and speed up rot.
- Weak braces. Add them early to stop sway.
- Rushing finish coats. Thin coats last longer than one heavy coat.
Managing these points is part of how to make a wooden picnic table with fewer headaches and better results.
Upgrades and Add-Ons (Optional)
Make your table fit your space and style. Small add-ons can raise comfort.
Ideas to try
- Umbrella hole. Drill a centered 1.5 to 2 inch hole. Add a plug for winter.
- Rounded ends. Use a paint can as a template for smooth corners.
- Hidden anchors. Use ground spikes to keep the table from moving.
- Footrest bar. A low 2×4 stretcher adds comfort.
- Rubber feet. Lift legs off wet ground and slow rot.
These upgrades show you how to make a wooden picnic table that looks custom without a big cost.
Frequently Asked Questions of how to make a wooden picnic table
What wood is best for a picnic table?
Cedar and redwood resist rot and look great. Pressure-treated pine is cheaper and lasts well outdoors.
What length should I choose for a family of four?
A 5 to 6 foot table works well for four people. Go 6 feet if you host guests often.
Do I need to use bolts, or will screws work?
Exterior screws work if you add braces and pre-drill. Bolts with washers add strength at the legs and last longer.
How thick should the tabletop be?
Five 2×6 boards give a sturdy top. This thickness handles daily use and outdoor stress.
How often should I refinish the table?
Plan on every 12 to 24 months, based on sun and rain. Recoat when water stops beading on the surface.
Conclusion
You now know how to make a wooden picnic table from start to finish. You picked a size, cut each piece, built a solid base, and added a weatherproof finish. With simple care, your table will serve meals, games, and memories for years.
Set a build day, gather your tools, and start the first cut. If you want more plans or tips, subscribe for updates or leave a comment with your questions.