

Mount a circular saw upside down under a flat top, add a straight fence, and align the blade for safe, accurate cuts.
If you want to save money and still rip boards clean and straight, learning how to make a table saw with circular saw is a smart move. I have built several of these shop workhorses.
In this guide, I break down each step, share what worked, and show what to avoid. By the end, you will know how to make a table saw with circular saw that is safe, square, and reliable for daily use.
.jpg)
Safety first: what you must know before you build
A DIY table saw can be safe, but only if you respect it. A circular saw has no native riving knife when mounted under a table. You must add safety features and use safe methods. Do not skip this section.
Key rules I follow in my shop:
- Always unplug the saw before any setup or blade change.
- Wear eye and hearing protection. Use a dust mask or a respirator.
- Add a splitter behind the blade to reduce kickback.
- Use push sticks and featherboards. Keep hands clear of the blade path.
- Install a proper on-off safety switch. It must be easy to hit fast.
- Use sharp, clean blades. Dull blades grab and burn wood.
- Never remove guards unless you replace them with safe parts.
I once tested cuts before adding a splitter. A narrow board pinched the blade and kicked back. I fixed it by adding a thin splitter and using a zero-clearance insert. You can avoid that scare.

Tools and materials checklist
You can build this with basic shop tools. Choose good plywood for a flat and stable top.
Core items:
- Circular saw, 15-amp, with a flat shoe and a quality rip blade
- Plywood, 3/4 inch, two sheets for a double-thick top
- Plywood, 3/4 inch, for the base or cabinet
- Hardwood strips for runners and fence faces
- Screws, bolts, washers, and lock nuts
- Switch with big stop paddle and a proper cord
- Wood glue, clamps, square, tape measure, and straightedge
- Jigsaw or router for the blade slot
- T-track and knobs for fence and hold-downs, optional
- Featherboards, push sticks, and a thin splitter
- Paste wax for the top and fence faces
Helpful but optional:
- Aluminum angle for a stiff fence
- Toggle clamps for a sled
- Dust port, shop vacuum, or small dust collector
.jpg)
Design overview and measurements
The goal is a flat, rigid table with a straight fence. The circular saw mounts under the top so the blade pokes through a slot. The fence locks parallel to the blade.
Plan a compact size:
- Top: 24 by 36 inches for most home shops
- Height: 34 to 36 inches to match your bench
- Fence travel: at least 18 inches to the right of the blade
- Insert plate: 8 by 12 inches, or sized to your saw
Build notes:
- Use two layers of 3/4 inch plywood for the top. This helps keep it flat.
- Pick the blade entry so offcuts fall free and do not bind.
- If space is tight, add folding legs or mount the unit on a cart.
One more tip. Keep the motor exhaust clear. Heat hurts accuracy and life.

Step-by-step: build the table base
A firm base keeps the top flat. A simple box with bracing works well. Pocket screws or glue and screws are fine.
Build steps:
- Cut sides and stretchers from 3/4 inch plywood. Aim for a 24 by 36 inch top footprint.
- Assemble a box with glue and screws. Check for square with a tape from corner to corner.
- Add a middle stretcher front to back under the blade area.
- Install levelers or casters rated for the weight. Locking casters are best.
- Add a shelf below for storage. It also stiffens the frame.
I like to add a diagonal brace at the back. It stops racking when you push stock.
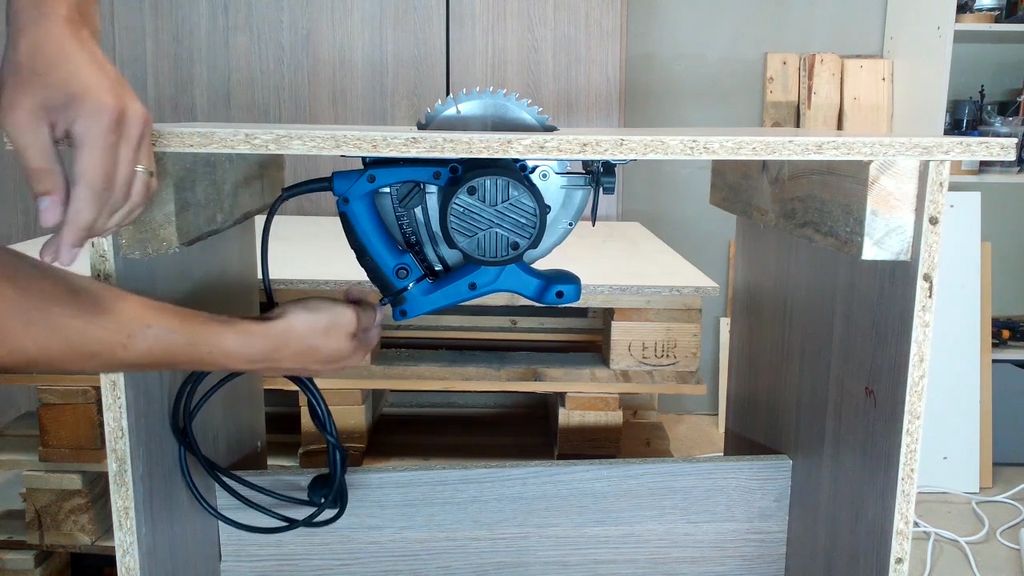
Step-by-step: mount the circular saw under the top
Mounting the saw well is the core of how to make a table saw with circular saw. The shoe must sit flat against the underside. The blade must be square to the top and the fence.
Do this:
- Laminate two layers of 3/4 inch plywood for the top. Clamp well and let cure.
- Place your circular saw on top, blade down, to trace the slot and mounting holes.
- Flip the top. Align the saw shoe under the lines. Mark mounting points on the shoe.
- Drill the shoe for bolts if safe to do so. Many saws have spare holes or slots. Use care and keep metal shavings out of the motor.
- Cut a blade slot with a jigsaw or router. Start with a narrow slot. You can widen later.
- Bolt the saw shoe to the underside with washers and lock nuts. Do not overtighten and warp the shoe.
- Set blade at 90 degrees with a good square. Lock the bevel. Add shims under the shoe if needed.
Before first power on, spin the blade by hand. It must not touch the top. Then test power with no load.
Build a straight fence and miter guides
A true fence makes or breaks the build. It must be straight, stiff, and hold square to the blade.
Fence steps:
- Make a T-square fence. Use a long beam of plywood or aluminum angle and a short head that grabs the front of the table.
- Face the fence with hardwood or plastic laminate. Wax it smooth.
- Add a clamp or cam lock at the front. A rear clamp helps for long rips.
- Check fence parallel to the blade with a tape. Adjust the head until it locks square.
Miter guides:
- Cut hardwood runners to fit snug in the miter slots.
- Build a simple crosscut sled. It will be more accurate than a miter gauge.
- Add a back fence to the sled and square it to the blade with test cuts.
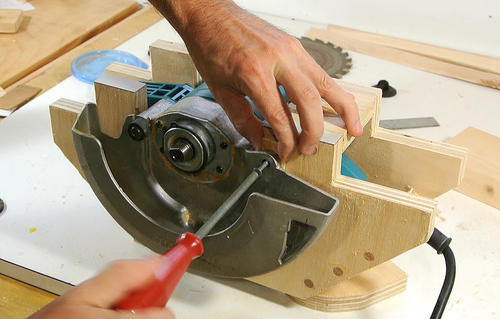
Surface, inserts, and zero-clearance
A slick surface helps stock glide and keeps cuts clean. A zero-clearance insert backs up the cut and reduces tear-out.
Make it better:
- Seal the top with polyurethane or shellac. Then rub in paste wax.
- Make a removable insert from 1/2 inch plywood. It should sit flush with the top on small ledges.
- Cut the insert slot by raising the blade through the insert. This gives perfect zero-clearance.
- Add a thin splitter to the insert aligned with the blade kerf.
If you cut bevels, make a second insert with a wider slot.
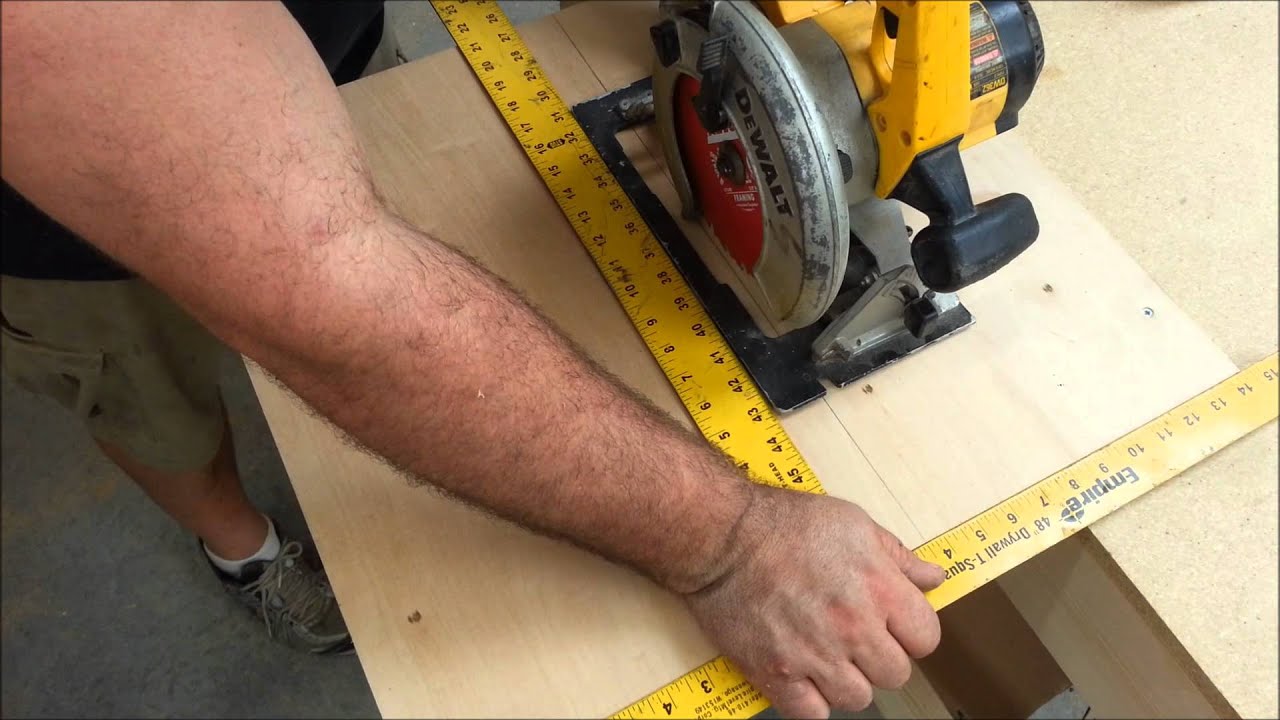
Dust collection and power control
Dust hurts your lungs and your line of sight. Control it at the source. Power control is also key for fast stops.
Practical steps:
- Box in the saw area with a drop panel and a dust port. Leave vents for airflow to the motor.
- Connect a shop vacuum to the port. Even a small unit helps a lot.
- Install a big red paddle switch on the front rail. You can hit it with your knee.
- Use a 12 or 14 gauge cord for 15 amp saws. Avoid long, thin cords.
I route the cord away from the blade path and clamps. This avoids snags and scary moments.
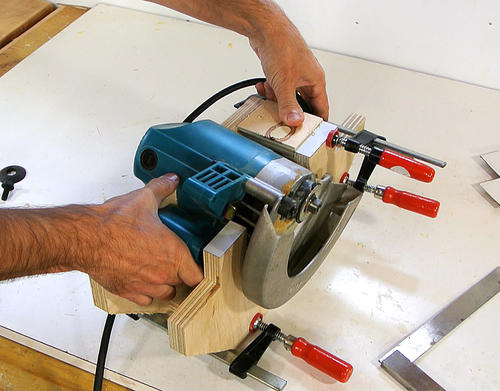
Alignment, calibration, and test cuts
Good alignment is the secret sauce in how to make a table saw with circular saw. Take your time here. Small tweaks pay big dividends.
Calibrate in order:
- Set blade 90 degrees to the top with a reliable square.
- Align the blade parallel to the miter slot. Shim the saw shoe if needed.
- Set the fence parallel to the blade. Use a feeler gauge or a strip of paper.
- Mark a scale for fence settings. A stick-on tape works well.
Make test cuts:
- Rip a long board and measure width at both ends. Adjust fence if needed.
- Crosscut on the sled and check for square with a knife line test.
- Rip thin strips to check for burning or drift.
Safe operation tips and techniques
Your DIY saw can cut clean and safe if you use good habits. Keep setups simple and repeatable.
Everyday tips:
- Stand to the side of the blade path. Never in line with kickback.
- Use a push stick or push block for any narrow rip.
- Keep the fence clean and waxed. Smooth fences track true.
- Do not cut warped or twisted wood without a jointed edge.
- Let the blade stop before pulling stock back.
If a cut feels wrong, stop. Adjust and try again. Patience saves fingers.
Cost, time, and when to buy instead
It is fair to ask if how to make a table saw with circular saw is worth it. For many, the answer is yes. You can build it in a weekend and save money.
Typical ranges:
- Cost: 80 to 250 dollars, depending on hardware and dust control
- Time: 6 to 12 hours across two days
- Skill: steady beginner to intermediate
When to buy instead:
- You need a riving knife, blade guard, and UL-listed safety features out of the box.
- You cut large sheets often and want a full fence system.
- You need repeatable bevel and height settings with fine controls.
Maintenance and upgrades over time
A little care keeps cuts sharp and the table true. Plan small upgrades as you go.
Do this monthly:
- Clean and wax the top and fence faces.
- Check bolts on the saw mount and fence head.
- Clean dust from the motor vents and switch.
Great upgrades:
- Add T-track for stops, featherboards, and hold-downs.
- Build a better crosscut sled with a stop block.
- Swap in a high tooth-count blade for plywood and melamine.
- Add an overarm guard with a clear shield.
Troubleshooting common problems
You may run into a few snags. Here is how I fix the usual suspects fast.
Quick fixes:
- Burning on rips: fence not parallel or blade dull. Realign and clean the blade.
- Cut width drifts: fence head not square. Shim or rebuild the head.
- Vibration: unbalanced blade or loose mount. Check blade, bolts, and add rubber washers.
- Tear-out: no zero-clearance insert. Make and use one for every blade.
- Kickback scare: no splitter or poor feed. Add a splitter and steady your stance.
Frequently Asked Questions of how to make a table saw with circular saw
Is it safe to use a circular saw as a table saw?
It can be safe if you add a splitter, a zero-clearance insert, and a solid fence. Use push sticks and a paddle switch and keep your hands clear.
What size table should I build?
A 24 by 36 inch top is a good start for small shops. It supports most rips and fits on a mobile base.
Which blade works best for this setup?
Use a 24-tooth ripping blade for solid wood and a 40-tooth combo blade for mixed work. Keep blades sharp and clean.
How do I keep the fence parallel to the blade?
Build a T-square fence that locks at the front and rear. Adjust the head until the fence reads the same front and back to the miter slot.
Do I need dust collection on a DIY table saw?
Yes, even a small shop vacuum helps a lot. It keeps lines of sight clear and reduces fine dust that can harm your lungs.
How do I align the blade with the miter slot?
Shim the saw shoe or mounting pad until a tooth at the front and back reads the same to the slot. Use a feeler gauge or a marked tooth.
Can I cut plywood sheets on this build?
You can cut smaller panels, but large sheets are not ideal on a small table. Use support stands or a track saw for full sheets.
Conclusion
You now know how to make a table saw with circular saw that is flat, square, and safe to use. Build a rigid base, mount the saw clean, add a straight fence, and dial in the alignment. Small safety parts like a splitter and zero-clearance insert make a big difference.
Start with a simple version this weekend. Then add a sled, T-track, and dust control over time. If this guide helped, share it with a friend, subscribe for more shop builds, or leave a comment with your results and questions.