
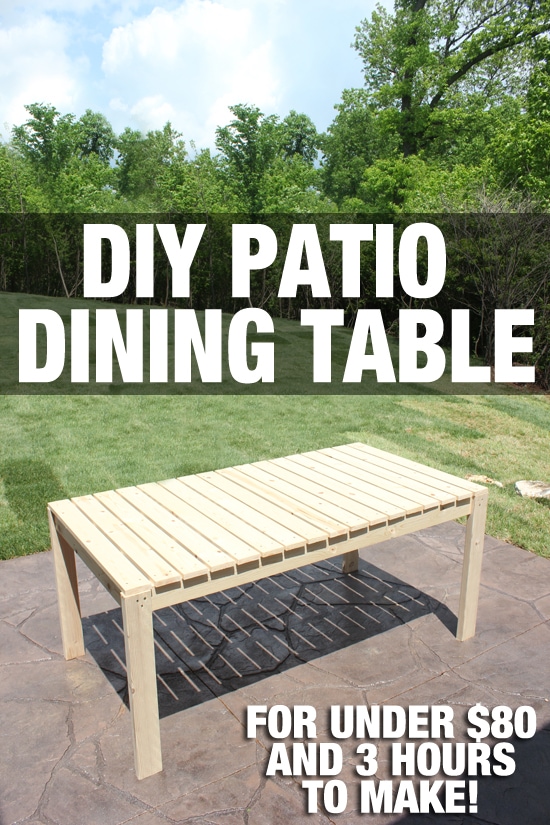
Measure, cut, assemble, and seal a sturdy, weatherproof wooden patio table.
If you want to learn how to make patio table that lasts for years, you are in the right place. I have built many outdoor tables and refined a method that is simple, safe, and reliable.
This guide shows how to make patio table frames and tops with pro tips, real examples, and clear steps you can follow today.

Materials and Tools You’ll Need
Choosing the right supplies is half the job. If you want to know how to make patio table that resists sun, rain, and bugs, start with the right materials. This section lists wood, fasteners, adhesives, and tools that hold up outdoors.
Recommended wood options for the top and base:
- Cedar. Light, stable, and rot resistant. Easy to cut and sand.
- Teak or ipe. Very durable, dense, and long lasting. Higher cost and harder to cut.
- Acacia or eucalyptus. Good value and stable with oil finish.
- Redwood. Weather resistant and easy to work with.
- Pressure-treated pine. Budget friendly for bases. Let it dry before finishing.
- Composite decking for slat tops. Low maintenance and stable.
Hardware and adhesives:
- Stainless steel or exterior coated screws. Use #8 or #10, 2 to 3 inches.
- Waterproof wood glue. Type II or Type III PVA or epoxy for critical joints.
- Figure-8 fasteners or Z-clips. These allow wood movement between base and top.
- Exterior wood filler. For small gaps and countersunk holes.
Finishes that work outdoors:
- Penetrating oil for exterior use. Fast and easy to refresh.
- Marine spar varnish or spar urethane. Strong UV defense and flexible film.
- Exterior deck stain plus clear topcoat. Good color control.
Tools that make the job smooth:
- Circular saw with a straightedge guide or a miter saw.
- Drill/driver with countersink and pilot bits.
- Random orbital sander with 80, 120, and 180 grit discs.
- Pocket hole jig (optional) for hidden joinery.
- Clamps, tape measure, speed square, and a level.
- Safety gear. Eye and ear protection and a dust mask or respirator.
Plan and Design: Size, Style, and Space
Good planning is key if you want to know how to make patio table that fits your space and seats your guests. Start with size, then choose style and features like an umbrella hole or a slatted top.
Standard heights:
- Dining table. 29 to 30 inches.
- Counter table. 36 inches.
- Bar table. 42 inches.
- Coffee table. 16 to 18 inches.
Sizing for seating:
- Rectangle for four. 28 by 48 inches minimum.
- Rectangle for six. 72 by 36 inches is a common pick.
- Round for four. 36 to 44 inches diameter.
- Allow 24 inches of width per person and 10 to 12 inches of overhang on the long sides.
Space planning:
- Leave at least 36 inches of clear space around the table for chairs and flow.
- Add a 1.5 to 2 inch umbrella hole at the center if you need shade.
- Use leveling feet if your patio is uneven.
Sample cut list for a 72 by 36 inch dining table (six seats):
- Top slats. Six to eight boards at 72 inches (add width to hit 36 inches).
- Aprons. Two at 63 inches, two at 27 inches (to sit inside the legs).
- Legs. Four at 29 inches (4×4 posts or laminated 2x4s).
- Stretchers. One or two at 27 inches for side-to-side bracing.

Step-by-Step: How to Make Patio Table
This is the core method for how to make patio table that is strong and flat. The steps are simple and repeatable. Read through once, then build.
- Mill and acclimate the wood
- Let wood rest 48 hours in a dry area. This reduces warp.
- Cut off factory ends to square the stock.
- Rip boards for clean edges if you want a tight top.
- Build the legs and base
- Cut legs to height. Use 4x4s or glue two 2x4s for each leg.
- Cut aprons. Subtract twice the leg thickness from the top length and width.
- Mark 3.5 to 4 inches down from the top of each leg for apron height.
- Join the base
- Use pocket screws, dowels, or mortise and tenon. Apply waterproof glue.
- Clamp the base square. Check diagonals. They should match.
- Add stretchers between the short aprons for extra stiffness.
- Prepare the top
- For a slatted top, space boards with 1/8 inch gaps for drainage.
- For a solid panel, use biscuits or dominoes and allow for movement.
- Dry fit the top. Mark for fasteners and alignment.
- Attach the top to the base
- Use figure-8 fasteners or Z-clips in slots. This allows the wood to move.
- Place fasteners every 8 to 12 inches around the apron.
- Do not glue the top to the base. Avoid splits later.
- Drill the umbrella hole (optional)
- Mark center. Drill a 1.5 to 2 inch hole with a hole saw.
- Seal the hole edges to block water.
- Sand smooth
- Sand at 80, then 120, then 180 grit.
- Break sharp edges with a small round-over or a light hand sand.
- Vacuum and wipe with a damp cloth to raise grain, then sand again at 180.
- Pre-finish parts if you can
- Seal end grain first. It drinks finish.
- Pre-finish the underside of the top and aprons.
- This reduces drips and helps protect hidden faces.
- Install hardware and levelers
- Add stainless screws and washers as needed.
- Install adjustable feet on legs for uneven patios.
- Check for wobble and shim as needed.
- Final assembly and check
- Tighten all joinery.
- Confirm the top is flat with a long level.
- Test chair fit and knee room.
Pro tip from the shop: In wet climates, I favor slatted tops with small gaps. They dry fast and stay flatter. If you still want a solid top, use movement-friendly fasteners and a flexible finish, not a brittle one.
Finishing and Weatherproofing
The finish you choose makes or breaks how to make patio table last in the sun and rain. Use products made for exterior use. Give special care to end grain and undersides.
Practical finish paths:
- Penetrating exterior oil. Wipe on three light coats. Re-oil once or twice a year.
- Marine spar varnish or spar urethane. Three to five thin coats. Sand lightly between coats. Great UV defense.
- Deck stain plus clear exterior topcoat. Good color, simple upkeep.
Best practices:
- Finish all faces, including the underside and inside aprons.
- Avoid interior polyurethane alone. It can crack outdoors.
- Let the finish cure for a few days before heavy use.
- Use low-VOC products if air quality is a concern.
Data-backed notes:
- Exterior oils soak in and move with the wood. This reduces peeling.
- Spar finishes add UV absorbers and remain flexible, which helps against sun and heat.
- End grain absorbs more finish. Two extra coats there can double life.

Optional Upgrades and Style Ideas
Small add-ons raise function and look. These ideas fit many plans for how to make patio table and help match your space and taste.
Easy upgrades:
- Umbrella and base. Add shade and comfort for long meals.
- Herringbone or chevron top. Glue to a plywood core for stability.
- Tile or stone inlay. Use cement board under tile and a flexible grout.
- Built-in ice bucket. Drop an insulated tub into a framed opening.
- Hidden bottle opener under the apron. Simple and fun.
Stability notes:
- Any inlay needs movement control. Use a floating frame and gaps.
- For heavy tops like concrete, upsize legs and stretchers.
:strip_icc()/100092481-ca052c16890440868979ff49832f94b9.jpg)
Maintenance and Care
Good care is part of how to make patio table last through seasons. A few small habits keep the table solid and good looking.
Simple routines:
- Clean with mild soap and water. Avoid pressure washers that can raise grain.
- Re-oil at the start of the season if you used an oil finish.
- For spar finishes, scuff sand and add a thin coat yearly as needed.
- Use a vented cover that lets moisture escape.
- Store or elevate feet during long wet spells to avoid wick-up.
Checks to run each spring:
- Tighten screws and inspect joints.
- Touch up end grain and the umbrella hole.
- Check for flaking finish and sand back before recoating.
Safety and Common Mistakes to Avoid
Safety first when you learn how to make patio table at home. A few simple rules protect you and your project.
Safety basics:
- Wear eye and ear protection and a dust mask.
- Clamp workpieces. Keep hands clear of blades.
- Work in a ventilated area when applying finishes or epoxy.
Common mistakes:
- Trapping wood movement by gluing the top to the base. Use movement-friendly clips.
- Skipping end-grain sealing. That is where water gets in first.
- Using interior screws. Go stainless or exterior coated.
- Leaving the underside unsealed. Finish all faces for balance and protection.
- Rushing the cure time. Let finish harden before use.
Budget, Timeline, and Sustainability
Plan cost and time early when you map how to make patio table for your patio size and style. A clear plan avoids waste.
Typical cost ranges:
- Budget builds with pressure-treated bases and softwood tops. Low to moderate cost.
- Mid-range with cedar or acacia and stainless screws. Moderate cost.
- Premium with teak or ipe and marine finishes. Higher cost but very long life.
Time estimate:
- Planning and shopping. Half a day.
- Cutting and base assembly. Half to one day.
- Top build and sanding. Half day.
- Finishing. Two to four days with dry times.
- Total. One weekend plus curing time.
Sustainable choices:
- Choose FSC-certified or reclaimed wood.
- Use low-VOC exterior finishes.
- Design for repair by using screws and replaceable slats.
.jpg)
Frequently Asked Questions of how to make patio table
What is the best wood for a patio table?
Cedar and teak are top picks because they resist rot and sun damage. Cedar is lighter and cheaper, while teak lasts longer with less upkeep.
How thick should the tabletop be?
Aim for 1 to 1.5 inches for most tops. Thicker tops look bold but add weight, so use stronger legs and stretchers.
Can I use pocket screws for outdoor joinery?
Yes, if you use exterior pocket screws and waterproof glue. Also seal the holes and coat with an exterior finish.
How do I allow for wood movement outdoors?
Use figure-8 fasteners or Z-clips to attach the top to the base. Do not glue the top to the aprons, and leave small gaps for slats.
What finish lasts longest in sun and rain?
Marine spar varnish or spar urethane with UV blockers lasts longer than many oils. It needs thin coats and light yearly upkeep.
How big should the gap be between slats?
Leave about 1/8 inch for drainage and expansion. In humid areas, 3/16 inch is safer.
Can I build a patio table without power tools?
Yes, but it takes longer. Use a hand saw, hand drill, and hand planes, and plan extra time for clean cuts and fit.
Conclusion
You now know how to make patio table parts that fit well, move right, and stand up to the weather. Plan the size, pick durable wood, use exterior fasteners, and seal every face. Add your style with slats, patterns, or inlays, and keep it fresh with simple care.
Start with a small project board to test your finish, then build your full table with confidence. If this guide helped, share it with a friend, subscribe for more step-by-step builds, or leave a comment with your own patio table ideas and wins.