
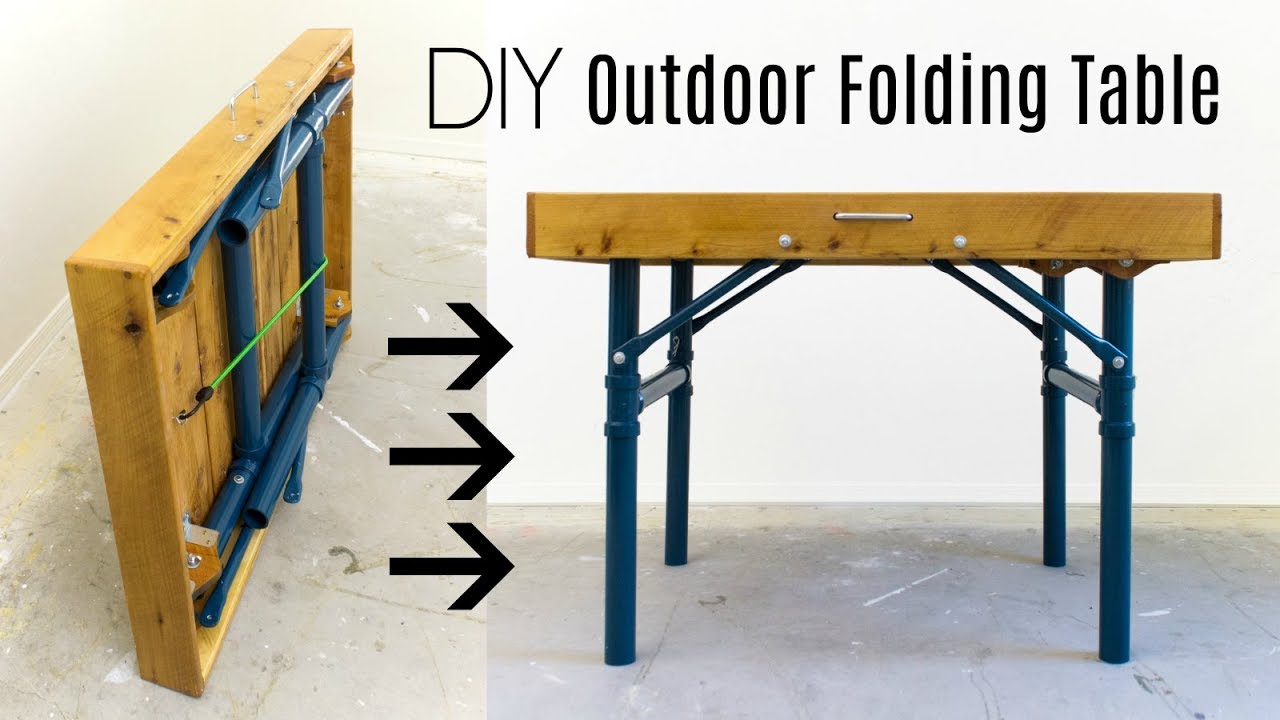
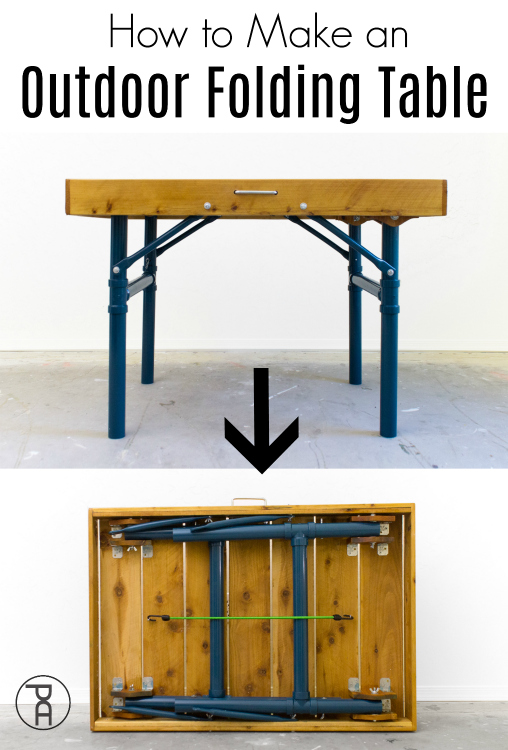
Install locking folding brackets, hinge stout legs, add braces, then align and secure.
If you want to learn how to make folding legs on a table that feel solid, look clean, and last, you are in the right place.
I have built and repaired many folding tables for shops, kitchens, events, and vans. This guide shows how to make folding legs on a table with step-by-step detail, clear tips, and pro checks you can trust.
What makes strong folding table legs
When people ask how to make folding legs on a table, they want fold-flat storage without wobble. Good folding legs do both through smart layout, the right hardware, and solid joinery. You will also need careful alignment, since even a small skew can cause shake or bind.
Plan for the real load. A light craft table is not a buffet table. Check the hinge and bracket ratings. Keep the center of gravity in mind. Use locks that hold the legs in both the open and the closed positions. A positive lock prevents surprise collapse, even when the table is bumped.
In my shop, the best results come from a rigid apron, quality folding leg brackets, and simple cross bracing. Add glides so the feet sit flat on the floor. That is how you get a quiet, firm table that folds in seconds.
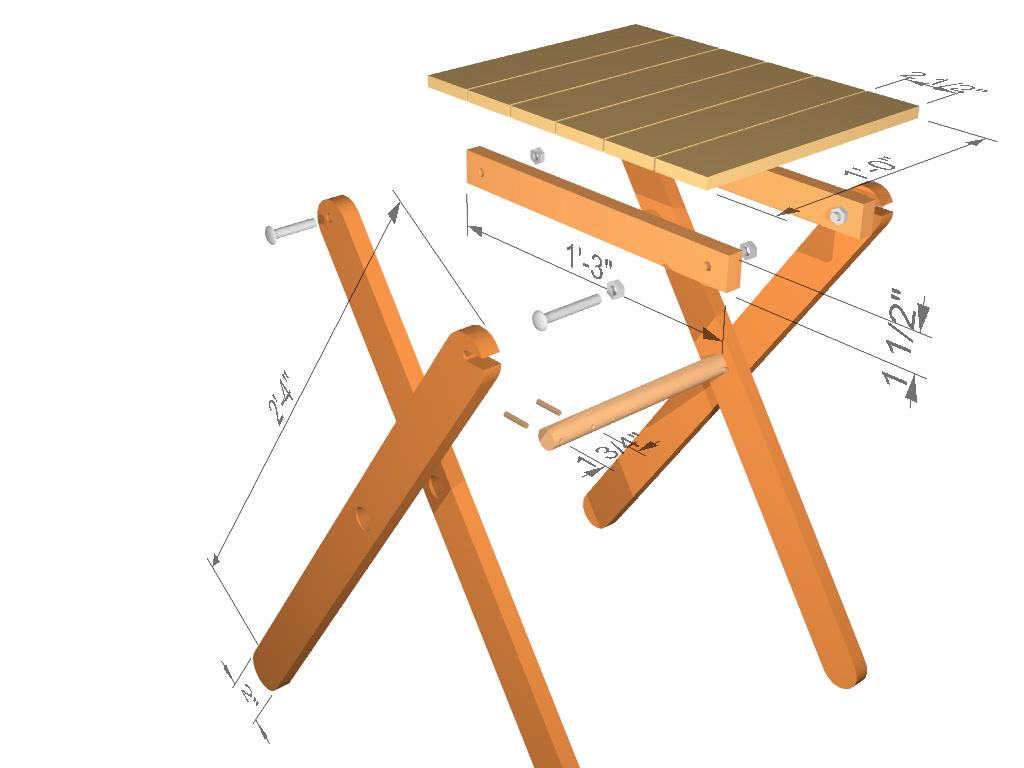
Plan and size your folding legs
Start with the use case. A dining top sits near 30 inches high. A desk sits near 29 inches. A standing bench can be 36 to 42 inches. Subtract the top thickness to get your leg length.
Mind clearance. Legs need room to fold under the top without hitting the apron. Test your leg profile with a scrap template before you drill holes.
Use these simple targets:
- Top thickness: 0.75 to 1.5 inches for most builds
- Leg stock: 1.5 by 1.5 inches or 2 by 2 inches for wood legs
- Bracket setback: 1 to 2 inches from edges to avoid splits
- Overlap: keep legs inset so fingers do not get pinched
If you search how to make folding legs on a table for a small space, consider tapered legs. A gentle taper lowers weight and helps fold clearance while keeping strength near the hinge.
Tools and materials you will need
Gather tools first. Good prep saves time and avoids mistakes.
Tools:
- Tape, square, and pencil for layout
- Drill and driver with sharp bits
- Countersink and pilot bits for clean holes
- Chisel or trim router for shallow recesses if needed
- Clamps for dry fits
- Wrench set for bolts and T-nuts
- Safety glasses and hearing protection
Materials:
- Tabletop and apron stock, straight and dry
- Leg blanks in hardwood or steel tube
- Folding leg brackets with positive locks
- Hinges if you design a custom swing
- Machine bolts, washers, and lock nuts
- Wood screws rated for your bracket size
- Threaded inserts or T-nuts for repeatable assembly
- Leveling feet or rubber glides
- Cross brace stock or metal straps for stiffness
As you learn how to make folding legs on a table, choose quality brackets. Cheap parts bend fast. Hardware is a small cost that makes a big difference.
Pick folding leg hardware and hinges
There are three common paths.
- Surface-mount folding leg brackets. These hold the leg and lock open. Many lock closed too. They are fast and clean. Choose a rating higher than your target load. For events, I use parts rated 200 to 500 pounds per leg set.
- Heavy hinges with a separate locking stay. This is more custom. It can look sleek. Use a sliding bolt or spring latch to lock open.
- Gate-leg frames. These legs swing out and form a brace under the top. They need more space and work best with long tops.
Check features that matter:
- Locking both open and closed
- Steel thickness and play at the pivot
- Mount hole size for machine screws
- Angle of the leg in the open position, often near 90 degrees to the top
- Service parts like springs and pins
If your goal is how to make folding legs on a table that packs flat in a van, pick low-profile brackets and flush fasteners. For outdoor use, choose zinc-plated or stainless parts.

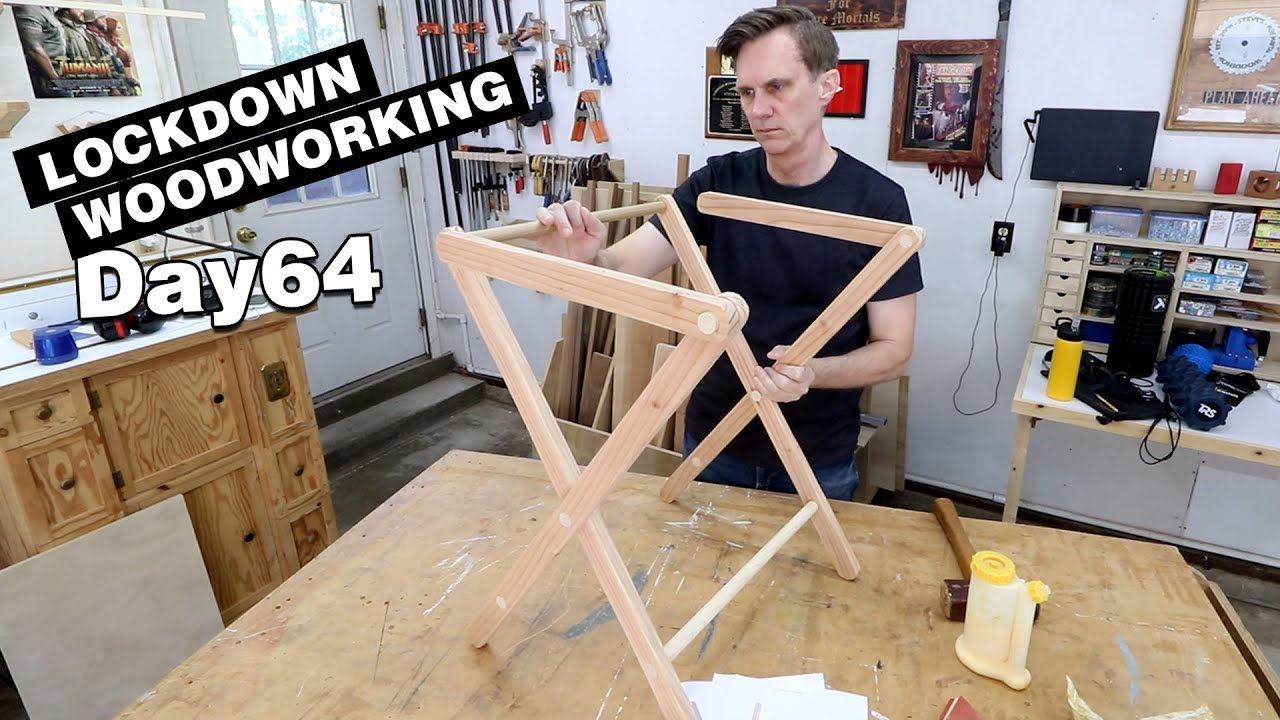
Step-by-step: how to make folding legs on a table
Follow this build flow. Dry fit each step.
- Lay out the apron. Glue and screw the apron rails under the top, inset from each edge by about 1 inch. Check for square with a diagonal measure.
- Mark leg centers. Place brackets on the apron and mark pilot holes. Keep a small inset so legs clear edges when folded.
- Drill pilot holes. Use a bit 85 to 90 percent of the screw root size. This avoids splits and lets screws bite. Countersink if heads must sit flush.
- Mount brackets. Drive screws by hand for the last turns. This keeps threads strong and avoids cam-out.
- Prepare legs. Cut legs to length. Ease sharp edges. Drill for bolts if your bracket uses a through-bolt pin. Fit leveling feet in the bottom.
- Test fold arc. Clamp legs in place and swing them. Check for rub on the apron or top clips. Adjust bracket setback if needed.
- Add locks. If brackets do not lock closed, add a simple latch or a Velcro tie. I like a spring toggle near the hinge. It stops rattle in transit.
- Add cross bracing. Use a removable stretcher between legs if the span is wide. A simple strap with two thumb screws can kill side wobble.
- Check racking. Push the table from each side. If you feel sway, add corner blocks at the apron. Tighten all fasteners.
- Secure hardware with thread locker. A small drop on machine bolts keeps them from backing out. Do not use on wood screws.
- Sand and finish. Seal all faces, including the underside. This helps against moisture and keeps the top flat.
- Final level. Adjust feet so the table sits with no rock. Re-check lock action after finish cures.
This method of how to make folding legs on a table is simple, repeatable, and strong. If you need knock-down stretchers, add threaded inserts. That gives you fast setup at events without loose lag screws.

Make it sturdy and safe
Strength comes from triangles. A cross brace or a diagonal strap turns a loose frame into a rigid one. Use light parts but place them smart.
Simple upgrades:
- Add a short gusset between leg and bracket if the bracket allows
- Use two brackets per leg on wide legs for anti-twist
- Install corner blocks at the apron joints
- Fit large rubber feet for grip on smooth floors
Safety habits:
- Never rely on friction alone for the lock
- Check the lock each time you open the legs
- Keep fingers clear of the hinge path
If you teach someone else how to make folding legs on a table, make sure they know to test the lock with weight near the center first. Then load the edges.

Finish, store, and care
Good finish helps the fold action too. Smooth faces reduce rub and wear.
Use simple steps:
- Seal wood with two to three coats of waterborne poly
- Lightly sand between coats with fine paper
- Wax the hinge pins for a smooth swing
- Add felt pads where legs touch the apron when folded
Store the table on its side or on edge. Strap the legs closed so they do not swing. A tidy setup extends the life of the locks.
If you plan how to make folding legs on a table for outdoor use, use exterior finish and stainless parts. Dry the table before you store it.
Troubleshooting, mistakes to avoid, and maintenance
Common mistakes:
- Misaligned brackets that force the leg off-square
- No cross brace on a long span
- Screws driven into end grain without pilot holes
Fixes:
- Shift the bracket by 1 to 2 millimeters to align the leg
- Add a removable stretcher to stop sway
- Replace soft screws with quality deck screws or machine bolts
Maintenance:
- Tighten all fasteners each season
- Replace worn lock pins at the first sign of play
- Clean and wax hinges for smooth action
If a friend asks how to make folding legs on a table that does not wobble, I tell them to start with alignment, then bracing, then hardware quality. That order solves 90 percent of issues.
Cost, time, and build variants
Typical cost ranges:
- Budget build. Basic brackets, pine legs, and screws. Expect 30 to 60 dollars.
- Mid-tier build. Locking brackets, hardwood legs, inserts, and glides. Expect 80 to 150 dollars.
- Heavy-duty build. Pro brackets with high load ratings and steel legs. Expect 150 to 300 dollars.
Time plan:
- Layout and drilling: 1 hour
- Assembly and fit: 1 to 2 hours
- Finish and cure: 1 to 2 days based on coat count
Popular variants:
- Nested U-shaped leg frames for extra knee room
- Tapered legs for weight savings
- Split top with center piano hinge for ultra-compact storage
These options all follow the same base rules for how to make folding legs on a table. Match hardware to load. Keep parts square. Lock open and closed.
Frequently Asked Questions of how to make folding legs on a table
What is the best hardware for folding legs?
Locking folding leg brackets are the fastest and most reliable choice. Pick steel brackets with locks in both open and closed positions.
How much weight can a folding table leg hold?
It depends on the bracket rating and leg material. Use a safety factor of two times your expected load for peace of mind.
Can I make metal folding legs instead of wood?
Yes. Steel tube with welded tabs works very well. Use brackets designed for tube legs or add plates for flat mounting.
Do I need an apron under the tabletop?
An apron increases stiffness and reduces wobble. Even a shallow apron of 1.5 to 2 inches improves strength a lot.
How do I stop the legs from rubbing the top when folded?
Add felt pads where contact occurs and adjust bracket setback. A slight chamfer on the leg edge also helps.
What is the ideal table height for a folding workbench?
For most users, 36 inches works for light work. If you do detail work, drop to 34 inches for better comfort.
Can I add wheels to folding legs?
Yes, but pick locking casters and widen the stance for stability. Test the locks on a flat surface before use.
Conclusion
You now have a clear plan for how to make folding legs on a table that fold fast, hold firm, and last. Start with smart layout, pick strong locking brackets, and brace the frame. Test the lock, level the feet, and keep hardware tight.
Build a simple version today and refine it on the next table. If you found this helpful, subscribe for more shop guides, or leave a comment with your build and questions.