
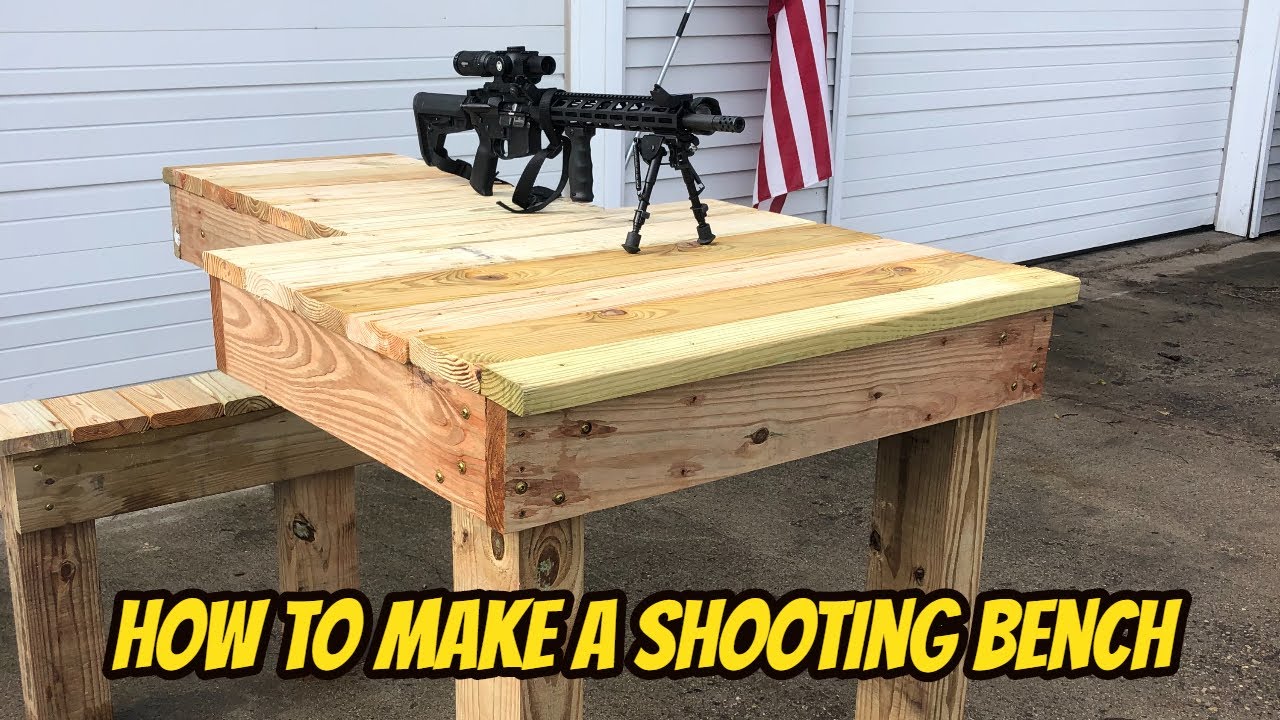
Build a stable DIY shooting table with plywood, 4×4 legs, and braces.
If you want to learn how to make a shooting table that is stable, safe, and easy to move, you are in the right place. I have built and tested many benches for ranges and backyards.
In this guide, I will show you how to make a shooting table step by step, with clear sizes, smart tips, and pro fixes. You will know how to make a shooting table that fits you, your rifle, and your space.
What a Shooting Table Does and Why It Matters?
A good shooting table removes human error. It gives your body a steady base, so your rifle can do its job. It also protects your gear, keeps you safe, and saves time at the range. If you plan how to make a shooting table with care, your zero holds, and your groups shrink.
Think of the table as the tripod for your body. It must stay rigid, flat, and level. A poor table wobbles and turns wind into wild shots. A strong table helps new shooters learn faster and helps skilled shooters test loads with less noise in the data.
When you learn how to make a shooting table the right way, you also learn to manage recoil, bag placement, and body posture. It becomes part of your shot routine. That is why design and build quality matter.
Planning Your Build: Dimensions, Height, and Ergonomics
Before you cut wood, size the top for real use. Ask who will shoot, what gear you use, and where you will set it. This is the first step in how to make a shooting table that fits your needs.
Use these proven sizes:
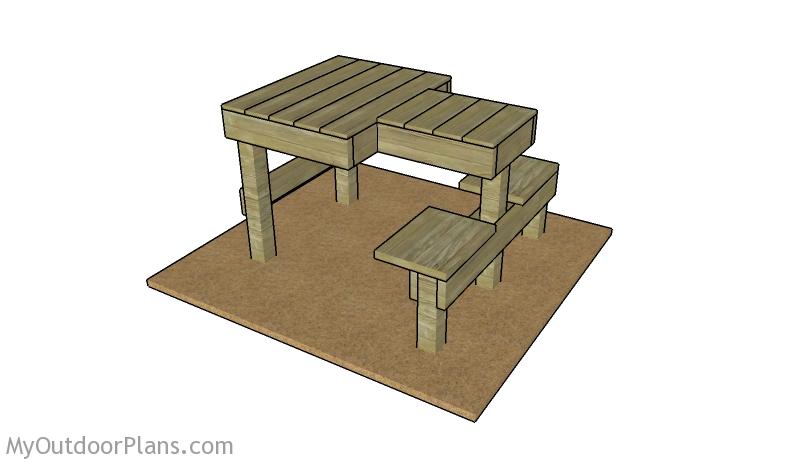
- Top size. 30 to 32 inches deep by 48 inches wide for most rifles.
- Cutout. A 9 to 12 inch semicircle or keyhole on the shooter edge for torso room.
- Side wings. 8 to 12 inches on both sides for bags, ammo, and tools.
- Height sitting. 30 to 32 inches with a standard chair or stool.
- Height standing. 38 to 42 inches if you want a standing bench.
- Leg spread. At least two thirds of the top depth for stability.
Test height with a mock-up. Stack boxes and a board, then shoulder your rifle. Your forearm should rest without shrugging your shoulder. This quick test is key when you plan how to make a shooting table for comfort and repeatability.
Materials and Tools Checklist
Pick materials that resist weather and flex. This is vital when you think about how to make a shooting table that lasts.
Recommended materials:
- Top. One sheet of 3/4 inch exterior plywood or marine plywood.
- Edge. Hardwood strips or a round-over routed edge for comfort.
- Legs. 4×4 posts for a fixed bench, or 1.5 inch steel tube for a folding unit.
- Bracing. 2×4 cross braces cut to fit between legs.
- Hardware. Galvanized lag screws, carriage bolts, washers, and lock nuts.
- Feet. Rubber levelers or adjustable furniture feet for uneven ground.
- Finish. Exterior primer, paint, or spar urethane. Construction adhesive.
Tools you will need:
- Circular saw or jigsaw for the top shape.
- Miter saw or hand saw for legs and braces.
- Drill and impact driver with bits and countersink.
- Sander with 120 to 220 grit paper.
- Measuring tape, square, pencil, and clamps.

Step-by-Step: How to Make a Shooting Table
This section gives a clear path. Follow it to learn how to make a shooting table with strong joints and a smooth top.
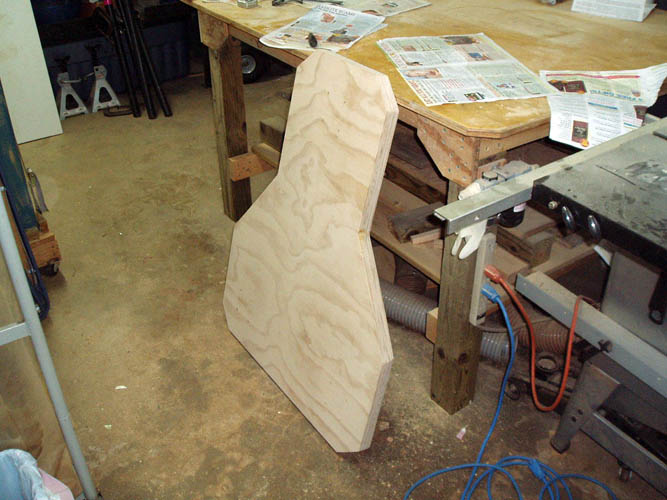
- Lay out and cut the top
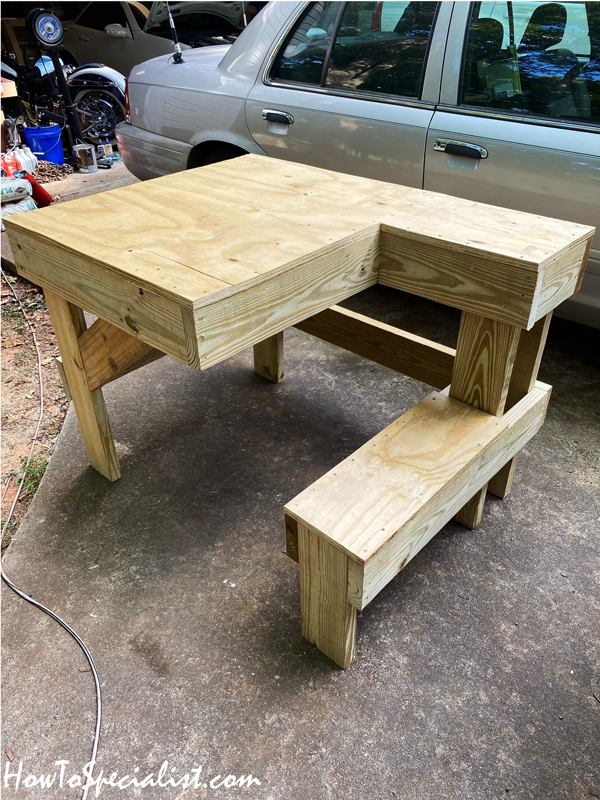
Draw a 30 by 48 inch rectangle on the plywood. Mark a 10 inch radius semicircle on the shooter edge. Cut the outline with a jigsaw and sand the edges smooth. - Soften or edge band the perimeter
Route a 1/4 inch round-over on all edges, or glue on hardwood strips. A soft edge saves forearms and bag fabric. - Add an apron under the top
Cut 2x4s to frame the underside, set in 1 inch from the edge. Glue and screw them to the top. This reduces flex under load. - Cut and attach legs
Cut three or four legs based on your height plan. For a tripod layout, use two legs at the rear corners and one front leg centered. For four legs, set them near the corners. Pre-drill and attach with carriage bolts and washers through the apron. - Install cross braces
Add 2×4 braces between legs in a triangle or X pattern. Use pocket screws or bolts. Bracing is the secret to a dead-still bench. - Fit adjustable feet
Drill for threaded inserts or bolt-on levelers under each leg. This lets you level the table on dirt or gravel. - Seal and finish
Fill screw holes, then sand the top to 220 grit. Roll on exterior primer and two coats of durable paint, or apply three coats of spar urethane. Seal edges well. Water enters there first. - Add comfort and gear features
Mount a rubber mat at the front third of the top. Add a small hook for ear pro and a tray for ammo. If you plan to travel, add carry handles on the apron. - Test and tune
Set the table on level ground. Load it with your rifle, rear bag, and ammo. Press on each corner. If it moves, tighten hardware or add a short brace. This final check is part of how to make a shooting table you can trust.

Stability and Accuracy Upgrades
If you want benchrest-level control, add a few low-cost upgrades. These steps show how to make a shooting table even better without complex tools.
- Front rest mounting. Embed T-tracks or threaded inserts to lock a bipod or front rest in place.
- Non-slip top. Glue a rubber pad where the front bag sits to stop drift.
- Recoil control. Add a rear bag stop strip to keep your bag steady under recoil.
- Wind and sun. Install a small umbrella mount on the apron to protect optics and ammo.
- Vibration damping. Stick closed-cell foam pads between the top and apron at intervals.
Each upgrade lowers shot-to-shot variance. This is why many builders who know how to make a shooting table invest time in fine tuning. Small tweaks pay off on paper.
Weatherproofing, Transport, and Storage
Your table will live outside or travel in a truck. Plan for both. This is a big part of how to make a shooting table that handles rain, sun, and miles.
- Seal the edges. Use epoxy or polyurethane on all end grain and cutouts.
- Use exterior hardware. Galvanized or stainless will not rust and seize.
- Choose a smart finish. Paint reflects heat and hides dust. Urethane shows wood grain but may need more upkeep.
- Go portable if needed. Folding legs with locking pins save space. Add tie-down points for the bed of a truck.
- Store smart. Keep it off wet ground. Use a cover that breathes to avoid trapped moisture.
Safety, Range Etiquette, and Legal Notes
Build with safety in mind. A stable bench helps with muzzle control and trigger discipline. When you learn how to make a shooting table, also plan safe use and care.
- Eye and ear protection. Keep sets on hooks under the top.
- Lead and dust. Wipe the surface after sessions. Do not eat over the bench.
- Range rules. Follow posted commands and chamber flags.
- Local laws. Transport firearms and ammo as required in your area. Build features that help, like a lockable storage box under the top if allowed.
These steps show respect for others and protect your gear. They also reflect the right way to think about how to make a shooting table for shared spaces.
Budget and Time: What to Expect
You can build a solid bench in a weekend. Plan your budget before you start. It helps frame how to make a shooting table that meets your goals.
- Basic fixed bench. 100 to 180 dollars for wood, hardware, and finish.
- Folding portable bench. 180 to 350 dollars with metal legs and levelers.
- Time. Four to six hours for cutting and assembly. Add a day for finish coats to dry.
A little more spent on bracing and finish saves money later. That is a core lesson in how to make a shooting table that lasts.
Common Mistakes and How to Avoid Them
Many builds fail for the same simple reasons. Learn from them. It will make how to make a shooting table much easier.
- Top too thin. Use 3/4 inch plywood. Thinner tops flex and shift zero.
- No cross bracing. Legs alone will wobble under recoil.
- Poor edge sealing. Water swells edges and ruins finish fast.
- Wrong height. Test with your chair and rifle before cutting legs.
- Cheap hardware. Soft screws strip, and rusty bolts lock up.
Fix these and your bench will feel rock solid in any weather.
Troubleshooting and Maintenance
Even a strong bench needs checks. Build a habit of quick care. This mindset supports how to make a shooting table that performs for years.
- Wobble shows up. Tighten bolts, add a diagonal brace, or swap worn feet.
- Finish wears. Sand lightly and add a new coat before water gets in.
- Top gets slick. Clean oil with alcohol. Add a new rubber mat square.
- Hardware squeaks. A drop of dry lube on threads helps and keeps dust off.
Keep a small kit in your range bag. A wrench, spare bolts, and sandpaper solve most issues on site.
Frequently Asked Questions of how to make a shooting table
What is the best height for a shooting table?
Most seated shooters like 30 to 32 inches. If you shoot standing, aim for 38 to 42 inches and test with your rifle.
Can I build a folding shooting table without welding?
Yes. Use heavy-duty folding leg brackets and locking pins. Bolt on adjustable feet to level it on rough ground.
How thick should the tabletop be?
Use 3/4 inch exterior plywood or better. Thicker tops reduce flex and help with consistent groups.
What shape works best for the top?
A rectangle with a semicircle cutout gives room for your torso and rear bag. Side wings help hold ammo and tools.
How do I keep it stable on uneven ground?
Install adjustable feet or screw-in levelers. Set them and check for rock by pressing each corner before you shoot.
What finish lasts longest outdoors?
Exterior paint over primer is tough and easy to touch up. Spar urethane looks great but needs more upkeep.
How much weight should it hold?
Aim for at least 200 pounds to cover rifle, rests, and pressure from your body. Strong braces and good hardware matter most.
Conclusion
You now know how to make a shooting table that is stable, safe, and tuned to your style. Pick the right size, brace it well, seal every edge, and add small upgrades that spare you wobble and wear. The result is a bench that makes load development and sight-in days calm and repeatable.
Start your build this week. Test the height with your rifle, sketch the top, and cut with care. Share your results, ask questions, and subscribe for more step-by-step builds and range tips.