

Use a 0.9 mm mechanical pencil or a carpenter pencil for most woodworking.
You can mark fast and cut true when your line is the right width. In this guide, I explain the best pencil size for woodworking, why it matters, and when to switch sizes.
You will learn how pencil diameter, hardness, and surface all work together. I draw from years at the bench and field work to help you mark smarter and build cleaner.
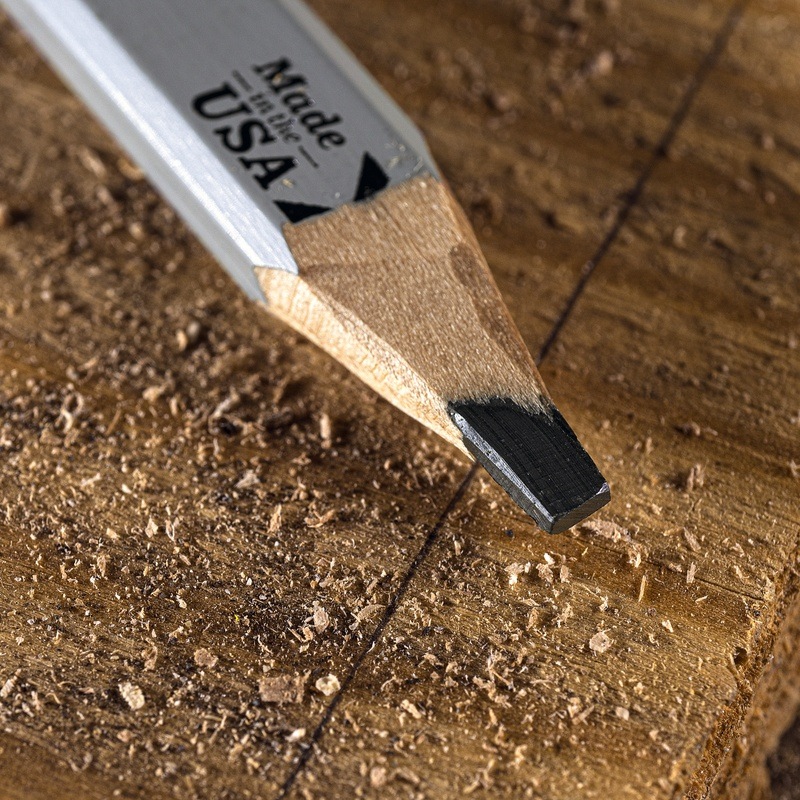
What “pencil size” means in woodworking?
Pencil size refers to lead diameter and the line it makes. It also includes hardness and the pencil body shape. Each factor affects accuracy, durability, and speed.
Lead diameter sets the minimum line width. A 0.5 mm lead makes a fine line. A carpenter pencil can leave a 2 to 4 mm swath if dull. Hardness affects smudge and breakage. HB is a safe middle ground. Softer 2B is darker and smoother. Hard H grades stay sharp but can score wood.
Shape matters on the job. A flat carpenter pencil will not roll off a roof. A 0.9 mm mechanical pencil slides into a pocket and stays ready. Knowing these parts helps you pick the best pencil size for woodworking for each step.

Source: mightydeals.com
The best pencil size for woodworking by task
Picking one pencil for every job is hard. Different tasks need different line widths. Here is how I match the pencil to the cut.
Rough layout and framing
For studs, subfloors, and layout lines on site, use a carpenter pencil or a 2.0 mm clutch pencil. The lines are bold, easy to see, and fast to draw. Keep a sharp long bevel for clear edges.
Cabinetry and casework
For cutting sheets and breaking down panels, I like 0.9 mm with HB lead. It is tough and clear. It will not snap when you mark on plywood glue lines. This choice fits the best pencil size for woodworking when speed and accuracy both matter.
Joinery and fine work
For dovetails, tenons, and tight fits, go thinner. Use 0.5 mm or 0.7 mm with H or HB lead. Place the mark on the waste side. For the tightest fit, switch to a marking knife on the final line.
Trim and finish carpentry
For baseboards, casing, and scribing, 0.9 mm with 2B lead reads well on paint and stain. On dark woods, use a white or yellow wax pencil. Lines pop without scratching the surface.
Rough lumber and outdoor work
On rough sawn boards, pencil can skip. A 2.0 mm or 1.3 mm mechanical lead works better. On damp wood, a lumber crayon or carpenter pencil is more reliable.
This task-based plan shows how the best pencil size for woodworking changes with the goal. Pick the thinnest line you can see and cut to with confidence.

Mechanical vs carpenter vs clutch pencils
Each pencil style has a place in the shop and on site.
- Mechanical pencil 0.9 mm: The daily driver. Tougher lead than 0.5 or 0.7 mm. Precise lines. Great for plywood, laminates, and hardwoods.
- Mechanical pencil 0.7 mm: A balance of fine and strong. Good for layout on stable surfaces. Snaps more than 0.9 mm if you press hard.
- Mechanical pencil 0.5 mm: Finest line. Best for joinery and tight fits. Needs a light touch.
- Clutch pencil 2.0 mm or 5.6 mm: Bold and smooth. Easy to reshape to a chisel tip. Good on rough fiber or dusty surfaces.
- Carpenter pencil: Low cost, rugged, huge eraser life if you whittle well. Sharp with a knife for a crisp wedge tip. Dulls fast on rough wood.
If you want one tool that covers most jobs, the best pencil size for woodworking is 0.9 mm in a reliable mechanical body. Add a carpenter pencil for framing and a 0.5 mm for joinery.

Lead hardness, color, and surface match
Lead grade changes how a line looks and lasts.
- HB: The default. Medium dark. Low smudge. Good for most woods.
- 2B: Darker and smoother. Nice on finish surfaces and dark grain. Smudges more.
- H or 2H: Hard and fine. Stays sharp. Can dent soft woods.
Match lead to the surface.
- Oily exotics: Use HB or H. Wipe first. A fine line will hold.
- Open grain oak or ash: Use 0.9 mm HB or 2B. A thin line can fall into pores.
- Melamine and laminate: 0.5 to 0.7 mm HB gives crisp marks that erase clean.
- Dark woods: White or yellow wax pencil or lumber crayon helps you see the cut.
Tuning hardness unlocks more value than size alone. Yet size and hardness together define the best pencil size for woodworking in your shop.

Accuracy, kerf, and line control
Your saw or chisel removes a set width. That is the kerf. Your pencil line also has a width. Keep both in mind.
A 0.5 mm line is half a millimeter wide. A dull carpenter pencil can be 3 mm wide. If you aim for a 1 mm reveal, a fat line can hide the true target. This is why I prefer 0.9 mm for general layout. I can see it fast and split it with a blade. For joinery, I go to 0.5 mm or a knife.
Use this simple rule. The line should be thinner than half your kerf. For a 2.2 mm circular saw kerf, keep pencil lines at or under 1 mm. This makes the best pencil size for woodworking precise and easy to follow.

Field-tested setups and recommendations
Here is what I keep in my apron. These choices come from years of builds, from decks to dressers.
- 0.9 mm mechanical, HB lead: My main marker. It survives drops and keeps a steady line.
- 0.5 mm mechanical, H lead: For dovetails, mortises, and hinge layout. It marks exact edges.
- Carpenter pencil: For studs, sheets, site work, and scribing drywall lines.
- 2.0 mm clutch, 2B lead: For rough lumber and outdoor cuts. Easy to shape to a wedge tip.
- White and yellow wax pencils: For walnut, wenge, and stained trim.
This mix hits the best pencil size for woodworking for most jobs. Start with the 0.9 mm and add the others as your work demands.

Care, sharpening, and shop workflow tips
A sharp point is a sharp plan. Keep your marks crisp and repeatable.
- Shape leads with a small fold of 220 grit sandpaper. Two strokes, quarter turn, repeat.
- For carpenter pencils, whittle a long, flat chisel tip. It makes thin and thick lines as needed.
- Wipe dusty surfaces before you mark. Dust makes lines weak.
- Press light. Let the lead glide. Heavy pressure widens lines and snaps lead.
- Store pencils point-up in a pocket sleeve. Protect the tip and your shirt.
Smooth marking speeds your build. Good habits make any pencil feel like the best pencil size for woodworking in your hands.
Cost, durability, and sustainability
Mechanical pencils cost more up front. Refills are cheap and last long. Carpenter pencils are cheap and tough but create shavings waste. Clutch pencils sit in the middle and take thick, long-lasting leads.
Durability depends on how you work. 0.5 mm snaps if you push hard. 0.9 mm holds up in a fast shop. Refillable bodies reduce trash. Wood pencils are renewable but shorter lived. Balance price, waste, and results. This keeps the best pencil size for woodworking also the best choice for your budget.
Frequently Asked Questions of best pencil size for woodworking
What pencil size is best for beginners in woodworking?
Start with 0.9 mm HB. It is strong and clear, yet not too thick. Add a carpenter pencil for rough layout.
Is 0.5 mm too thin for woodworking?
It is perfect for fine joinery if you use a light touch. For rough work, it snaps and is hard to see.
What lead hardness should I use on hardwood?
Use HB for most hardwoods. If you need darker lines, switch to 2B and wipe the surface clean after.
Do I need a marking knife if I have a fine pencil?
A knife is best for exact joinery lines and crisp shoulders. Use a 0.5 mm pencil to plan, then knife the final edge.
What is the best pencil for marking dark wood?
Use a white or yellow wax pencil for high contrast. A silver artist pencil also shows well and erases with a soft gum.
Is a carpenter pencil accurate enough for cabinets?
Yes, if you keep a sharp chisel tip and mark the same face. For tight fits, switch to 0.9 mm or 0.5 mm on the final line.
How many pencils should I keep in the shop?
Keep three. A 0.9 mm for daily use, a 0.5 mm for joinery, and a carpenter pencil for rough layout. This covers the best pencil size for woodworking needs.
Conclusion
Pick the thinnest line you can see and split with your tool. For most builds, 0.9 mm HB is your workhorse. Add 0.5 mm for fine joints and a carpenter pencil for rough work. Match hardness and color to the wood, and sharpen often.
Set up your kit today and test it on a small project. Track which marks you see fastest and cut to cleanest. If this guide helped, share it with a friend, subscribe for more shop tips, or leave a comment with your go-to setup.