
Build a vented frame, fit a rated burner kit, and connect gas safely.
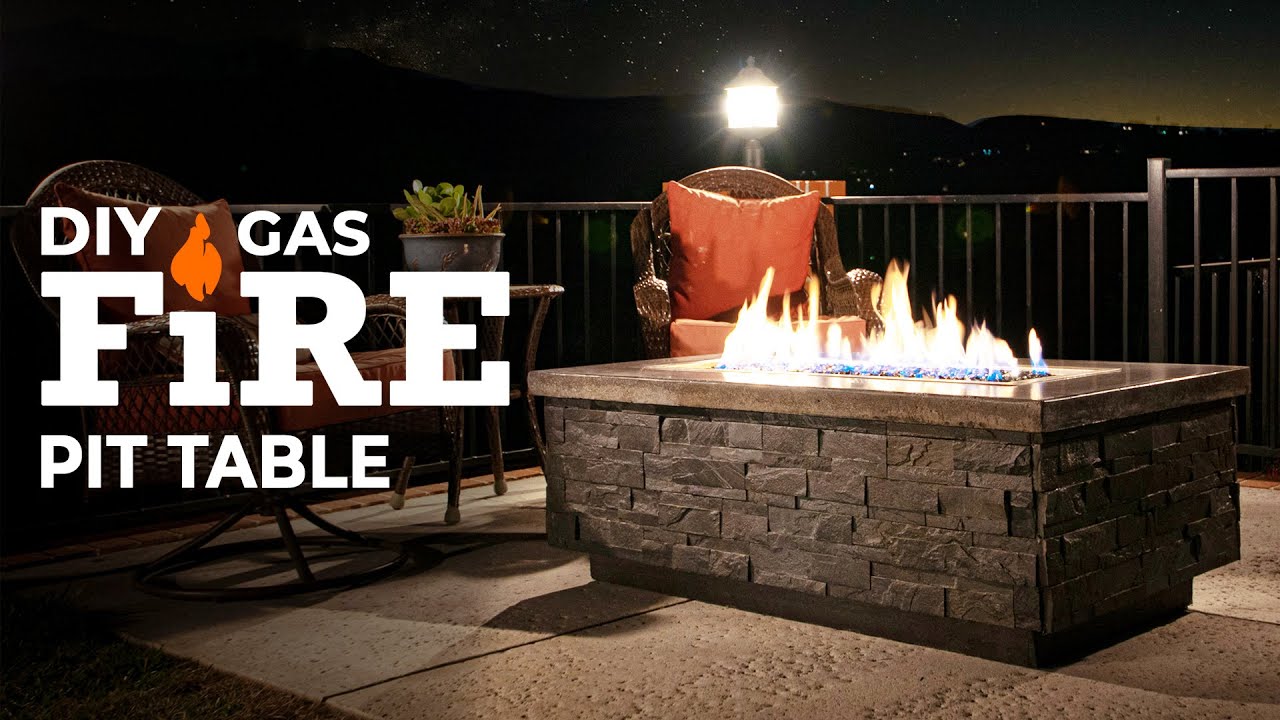
A gas fire table is a sleek mix of form and heat. In this guide, I show you how to make a gas fire table step by step, with safety at the core. I have built many units for patios, rentals, and clients.
You will get real tips, hard-won lessons, and pro-grade methods that keep your space safe and warm. If you want to learn how to make a gas fire table without guesswork, you are in the right place.
Plan, safety, and codes
Before you start, understand how to make a gas fire table safely. Gas is simple when you follow the rules. It turns risky when you cut corners.
Follow your local code. Propane follows NFPA 58. Natural gas follows NFPA 54 and local fuel gas codes. Many places require a licensed pro to make the final gas hook up. Do not skip permits if they are needed.
Key safety points:
- Use only CSA or UL listed burners, valves, hoses, and regulators.
- Vent the enclosure. Place two vents on opposite sides near the base. Each should be at least 18 square inches for propane. Follow the kit maker’s spec first.
- Keep clearances. Most burner pans need 2 inches to walls and 4 inches to combustibles. Check your manual.
- Never store a propane tank in a sealed box. Propane is heavier than air. It needs low vents to drain.
I have seen projects fail from poor venting. The flame went lazy and sooty. A small vent fix made a big change.

Tools and materials checklist
Here is what you need for how to make a gas fire table at home. Pick quality tools. It saves time and stress.
Tools:
- Tape measure, square, and pencil
- Miter saw or circular saw with guide
- Drill, impact driver, and hole saws
- Masonry blade if cutting pavers or stone
- Wrenches, pipe thread sealant for gas rated use
- Safety gear: gloves, eye and ear protection
Materials:
- Frame: pressure-treated lumber, metal studs, or welded steel
- Backer: cement board for fire areas
- Top: concrete, stone slab, porcelain pavers, or tile
- Burner kit: stainless burner ring or tray, burner pan, control valve, air mixer for propane, key valve or ignition, hoses, regulator
- Media: lava rock base and fire glass on top
- Vents, heat shield, and high-temp sealant
- Leveling feet and weather cover
Pro tip: Buy the burner kit first. Then size the table to fit it. This one choice drives the rest.
Design and sizing basics
A key step in how to make a gas fire table is choosing the layout. Think size, seating, wind, and fuel type.
Choose the shape:
- Rectangle for long sofas. Good for line burners.
- Square for chat sets. Good for round burners.
- Round for tight decks. Easier to walk around.
Pick the size:
- Coffee table height is 16 to 18 inches.
- Dining height is 28 to 30 inches.
- Allow 18 inches of knee room around the flame.
Select BTU and burner size:
- Small patios: 45,000 to 65,000 BTU.
- Medium areas: 65,000 to 90,000 BTU.
- Large tables: 100,000 to 125,000 BTU and up.
- A 20 lb propane tank runs most burners up to about 90,000 BTU with a standard regulator.
Plan a lid. A flat, snug lid keeps media clean and stops water.
Burner types and gas components
When learning how to make a gas fire table, pick the right burner. It shapes the look and the flame.
Burner choices:
- Round ring: even, tall flame. Classic chat fire.
- H-burner or linear: long ribbon of flame. Great for modern looks.
- Pan or tray: helps hold media and shield heat.
Fuel parts:
- Propane needs an air mixer. This helps burn clean and cut soot.
- Natural gas does not use an air mixer in most kits.
- Use a key valve or ignition. Match light is simple. Spark or electronic adds ease.
Ignition options:
- Match light: open gas, light with a long lighter. Few parts. Low cost.
- Push-button spark: button makes a spark at the burner. Simple and safe.
- Electronic with safety: flame sense shuts gas if the flame goes out. Best for windy areas.

Step-by-step: build the frame and base
This is the core build for how to make a gas fire table. Work on a flat, level spot. Keep cuts square.
- Mark the footprint. Add 3 to 4 inches around the burner pan for clearances.
- Build the frame. Use 2x4s or metal studs. Add cross braces under the burner area.
- Skin the frame. Screw on cement board in fire zones. Use exterior sheathing on the rest if allowed.
- Add vents. Cut low vent holes on opposite sides. Add grilles.
- Add a floor. Fit a non-combustible shelf or steel pan to hold the burner pan.
- Fit leveling feet. A flat table helps a steady flame.
I once skipped extra bracing under a big stone top. It sagged over time. One extra cross brace would have saved a redo.

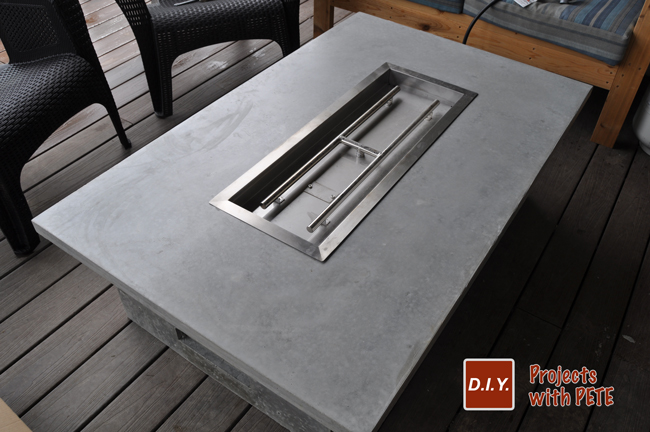
Step-by-step: install the burner pan and top
For how to make a gas fire table that drains water, slope the pan a touch to the drain hole.
- Dry fit the burner pan in the cutout. Leave the maker’s gap to walls.
- Drill a drain hole in the pan area if not built in. Route a tube to daylight.
- Add a heat shield under the pan. This guards wood or composite parts.
- Place the top. Use a stone slab, cast concrete, or pavers on mortar. Leave a service access panel.
Keep the burner ports up. Do not block them with glass or rock. Media should sit 1 to 2 inches above the burner.
Gas hookup, venting, and leak testing
The most critical part of how to make a gas fire table is the gas path. Keep runs short and protected.
For propane:
- Use a 20 lb tank or a larger remote tank per code.
- Use a rated regulator at 11 inches water column.
- Install an air mixer at the burner inlet.
For natural gas:
- Supply should be 7 to 10 inches water column per maker spec.
- Use hard pipe or a rated flex connector. Protect from heat and rub points.
Connection steps:
- Mount the key valve or control in an easy reach spot.
- Run gas line to the valve. Then to the burner through the pan.
- Apply gas-rated thread sealant on NPT threads. Do not use on flare fittings.
- Soap test. Mix dish soap and water. Brush all joints. Look for bubbles. Fix any leaks before lighting.
I hire a licensed gas tech for the final tie-in. It is fast and gives peace of mind.
Finish choices: media and weatherproofing
To finish how to make a gas fire table with style, choose the right media and sealants.
Media layering:
- First layer: 1 inch of lava rock. It is light and lets air flow.
- Top layer: tempered fire glass or tumbled lava. Keep ports clear.
- Do not use river rock or regular glass. They can pop or shatter.
Weather care:
- Seal stone and concrete tops with an exterior sealer.
- Add a snug cover. Keep water out of the burner and pan.
- Drill small weep holes in the low spots of the burner pan area.
Wind screens help in breezy yards. They raise flame stability and reduce lift.
Ignition, first fire, and tuning
Many ask how to make a gas fire table light fast and safe. The answer is a clean gas mix and good venting.
First fire steps:
- Open the valve a little. Let gas flow for two to three seconds.
- Light with a long lighter or use the ignition. Keep your face back.
- Add gas slowly. Watch flame color and height.
Tuning tips:
- Yellow tips are fine. All yellow may mean too much gas or poor air.
- Soot means propane needs more air. Check the air mixer and media depth.
- Blowouts in wind mean you need a wind screen or lower the flame.
Maintenance, troubleshooting, and upgrades
Knowing how to make a gas fire table is half the work; keeping it tuned is next. Set a simple upkeep plan.
Seasonal tasks:
- Vacuum ash and dust from the pan and burner.
- Check hose and fittings for cracks or rub wear.
- Test for leaks with soap at the start of each season.
Common fixes:
- Flame low: regulator may be stuck. Reset by closing valves and opening slow.
- Flame lifts: reduce gas flow or add a wind screen.
- Soot: clear blocked ports and confirm the air mixer is in place.
Easy upgrades:
- Add a glass wind guard.
- Swap lava to premium fire glass.
- Install an electronic ignition with flame sense.
Budget, time, and common mistakes
Plan costs before you start how to make a gas fire table. This helps you choose the right kit and finish.
Typical costs:
- Burner and control kit: 150 to 900 dollars.
- Frame and top: 150 to 1,200 dollars, based on materials.
- Pro gas hookup: 150 to 500 dollars.
Typical time:
- Design and buy: 1 to 2 days.
- Build frame and top: 1 to 2 days.
- Hookup and finish: 0.5 to 1 day.
Mistakes to avoid:
- No vents or small vents. Fix by adding two low vents.
- Burner too big for the tank. Match BTU to supply.
- No drain. Water pools and rusts parts.
- Media piled too high. It chokes air.
Frequently Asked Questions of how to make a gas fire table
Is propane or natural gas better for a DIY fire table?
Propane is easy for patios since tanks are portable. Natural gas is great if you have a line and want endless fuel.
What BTU burner should I choose?
For small tables, 45,000 to 65,000 BTU works well. Larger tables can go 90,000 BTU and up, with proper supply.
Do I need an air mixer for propane?
Yes, most propane burners need an air mixer to burn clean. It helps cut soot and keeps flames steady.
How do I vent the enclosure?
Add two low vents on opposite sides of the base. Follow your burner maker’s minimum area, often 18 square inches each.
Can I store a propane tank inside the table?
Do not store a tank in a sealed box. If your design holds a tank, it must have low vents and easy access.
How do I stop soot on the glass?
Use a propane air mixer, keep media depth correct, and do not block ports. Check for proper gas pressure too.
Can I use regular glass or river rock as media?
No. Use tempered fire glass or rated lava media. Other stones or glass can crack or pop from heat.
Conclusion
You now know how to make a gas fire table from plan to polish. Pick a rated burner, build a vented frame, set a solid top, and make a clean, tested gas path. Use safe parts, follow local code, and take your time on each step.
Bring your idea to life this weekend. Start with the burner kit, sketch your size, and set a budget. If you want more tips or a cut list, subscribe, ask a question, or share your build in the comments.