
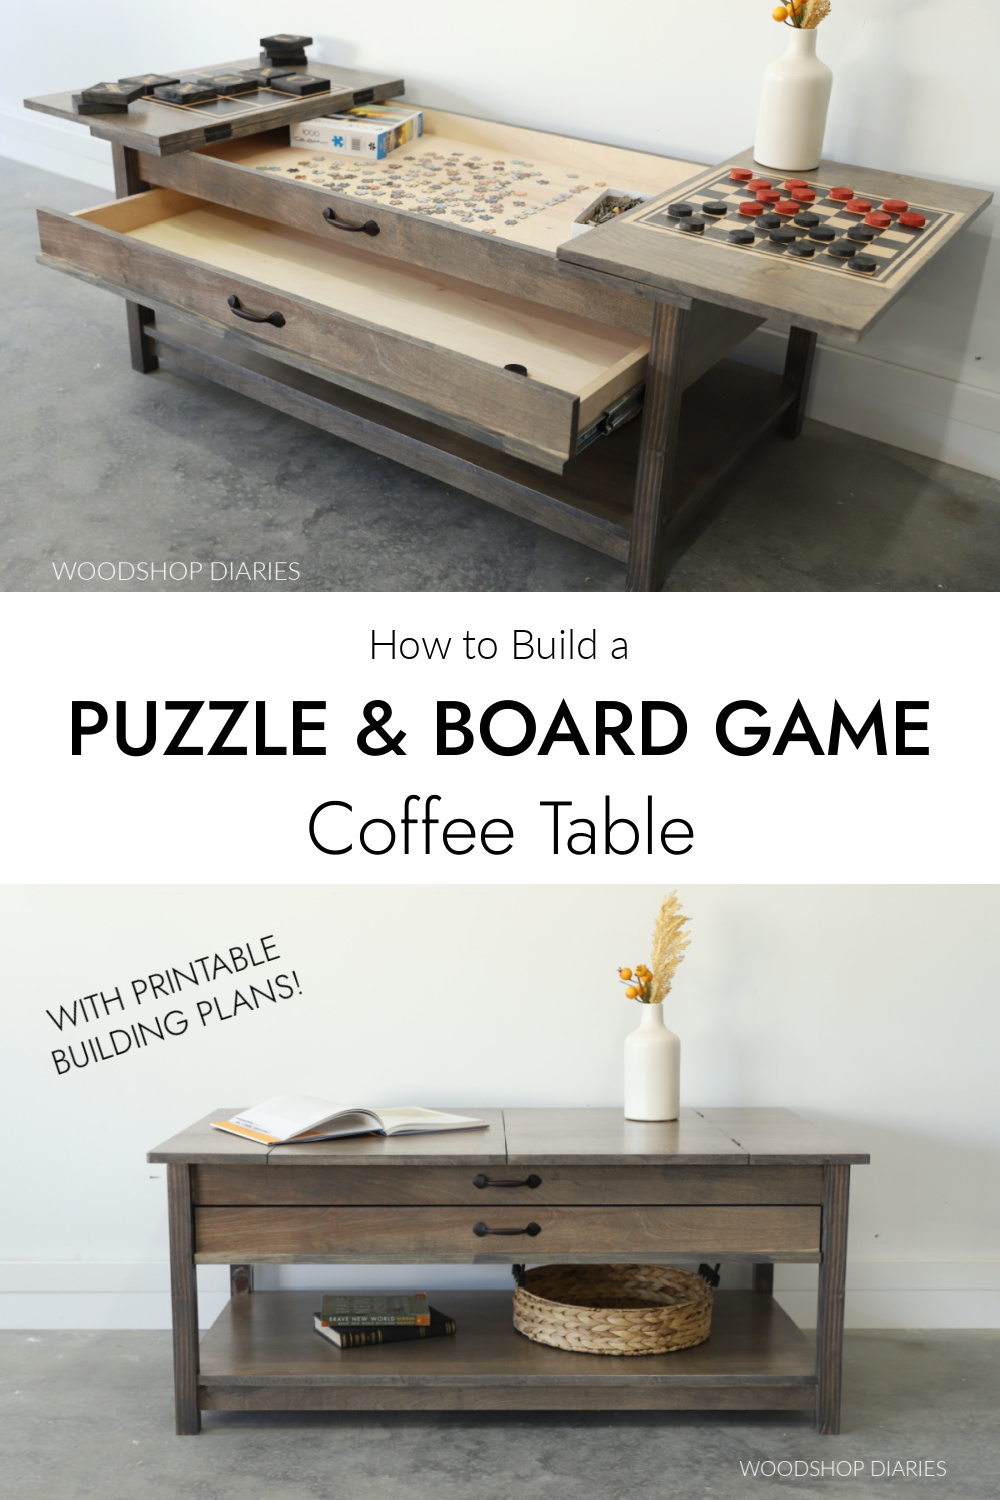
Build a flat, portable table with a raised edge, smooth top, and storage.
If you want to know how to make a puzzle table that looks clean, lasts for years, and fits your space, this guide is for you. I combine shop-tested steps, ergonomic tips, and simple plans so you can build with confidence.
I have built many puzzle tables for families and hobby groups, and I will show what works, what fails, and what to improve next time.
What Makes a Great Puzzle Table?
A good puzzle table is flat, bright, and strong. It should fit a 1,000-piece puzzle with room for trays. Most 1,000-piece puzzles measure about 20 by 27 inches. Aim for a working area of 26 by 36 inches or larger to keep trays and the box handy.
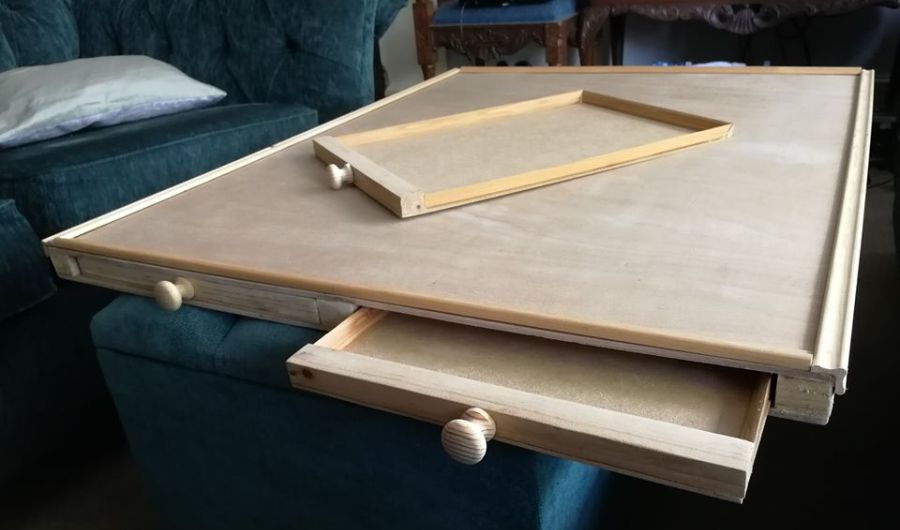
Add a lip to stop pieces from sliding off. Keep the lip 0.25 to 0.5 inch tall. Choose a smooth top so pieces slide without snagging. Consider felt or cork if you like a soft surface, but seal wood if you prefer a wipe-clean top.
If you plan to move it, use folding legs or casters with brakes. If this is your first time learning how to make a puzzle table, start with a simple frame and upgrade later.

Tools and Materials
You can build with basic tools. A circular saw and drill are enough. A miter saw and sander help.
Tools:
- Measuring tape, square, and pencil Accurate layout is key.
- Circular saw with guide track Clean, straight cuts.
- Miter saw or handsaw Fast crosscuts for the frame.
- Drill and driver, countersink bit Strong, neat joints.
- Orbital sander with 120 to 220 grit Smooth finish.
- Clamps Hold parts tight while you fasten or glue.
- Safety gear Glasses, hearing protection, dust mask.
Materials:
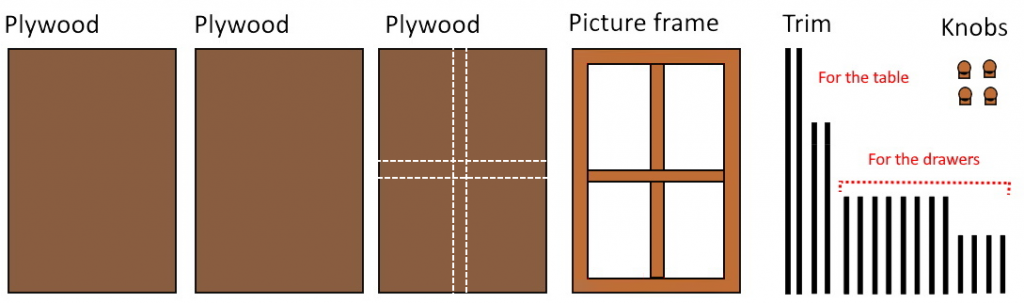
- Top 3/4 inch plywood, MDF, or hardwood panel
- Frame and lip 1×3 or 1×2 solid wood
- Felt or cork roll optional for a soft work surface
- Wood glue and 1.25 to 1.5 inch screws
- Water-based polyurethane or polycrylic low odor and fast dry
- Edge banding or T-molding optional for clean edges
- Drawer slides 12 to 18 inch if adding trays
- Casters with brakes if making it mobile
- Pulls, magnets, or rare-earth catches for covers
Sizing and Simple Cut List
Sizing comes first when you plan how to make a puzzle table. Pick the puzzle size you use most, then add buffer space. Here is a popular plan that fits most 1,000-piece puzzles.
Suggested outer size:
- Top 34 by 26 inches for a compact design
- Working area 30 by 22 inches inside the lip
- Lip height 0.25 to 0.5 inch above the surface
Sample cut list for the compact build:
- Top One panel, 34 by 26 inches, 3/4 inch thick
- Long rails Two boards, 34 inches, 1×3
- Short rails Two boards, 24.5 inches, 1×3 allows for rail thickness
- Lip strips Two at 34 inches and two at 26 inches, 1/4 to 1/2 inch tall
- Optional trays Two panels at 14 by 10 inches with thin edging
Adjust sizes if you plan to store the puzzle box under the lip. If you want more room, scale to 38 by 28 inches. That size can fit some 1,500-piece puzzles.
Step-by-Step: How to Make a Puzzle Table
Follow these steps to build a durable, smooth table. Take your time on cuts and sanding. Precision here saves fixes later.
- Break down the top. Cut your top panel to size. Use a guide track or a straight edge. Sand edges lightly.
- Build the frame under the top. Cut the 1×3 rails to length. Dry fit them under the top, flush with the edges. Glue and screw them to the underside of the top.
- Add cross support. For larger tops, add one center brace. This keeps the top flat.
- Prepare the lip. Rip thin strips to 1/4 to 1/2 inch tall. Ease the top edge with sandpaper so it feels smooth to the wrist.
- Install the lip. Mark a line 1/8 inch in from each edge on the top. Glue and pin-nail or predrill and screw from below. Keep the inner opening square.
- Choose the surface. If you want felt or cork, cut it to fit inside the lip. Adhere with contact cement or spray adhesive. Roll out bubbles with a J-roller or a clean paint roller.
- Sand and finish. Sand all wood to 180 or 220 grit. Apply two to three coats of water-based polyurethane on exposed wood. Scuff sand between coats.
- Add legs, base, or casters. For a coffee-table style, attach legs to the frame. For a topper style, add soft pads so it sits on an existing table. For mobility, add locking casters to a base.
- Test and tune. Slide several pieces. They should move easily and not catch. Check the lip height with a corner piece. Adjust if needed.
Safety notes: Wear eye and hearing protection. Work on a stable surface. Ventilate when applying finishes. If you are new to woodworking and want to learn how to make a puzzle table safely, cut scrap first and test your methods.

Storage and Portability Upgrades
Storage makes daily use easier. Portability helps small spaces. Plan these early in your build.
Good add-ons:
- Slide-out trays Shallow trays under the top hold sorted colors and edges.
- Side wings Hinged leaves fold out for extra space, then fold in.
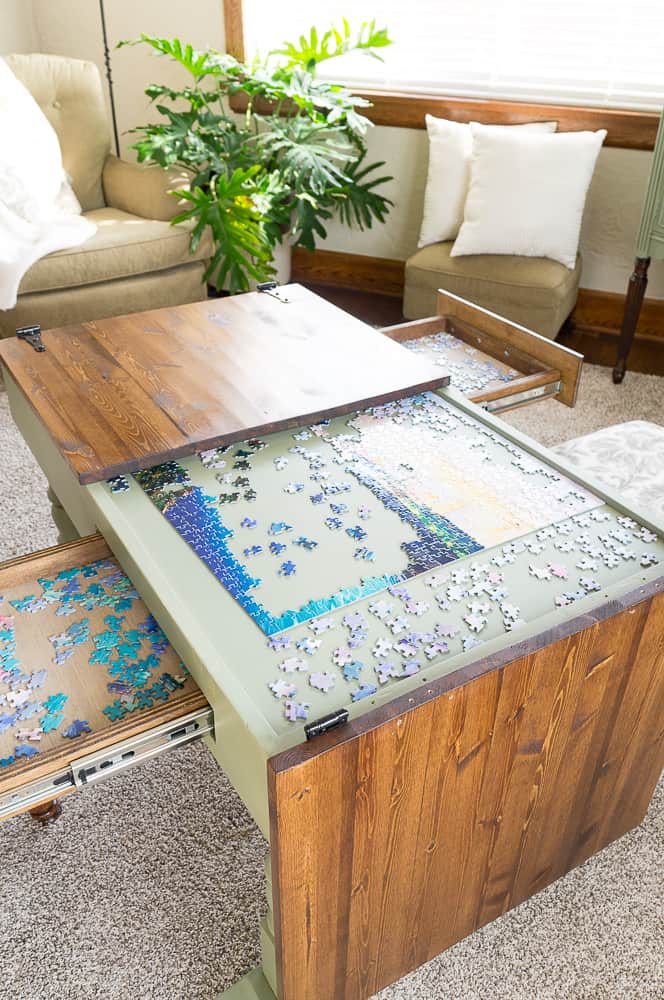
- Dust cover A thin, light lid with magnets keeps pets and dust away.
- Handles or finger pulls Cut small slots under the top to lift and move.
- Folding legs Use lock-in-place hinges for easy storage under a bed.
- Casters Heavy-duty, rubber casters roll smooth and lock firm.
If you use your table in a living room, a light lid is worth it. You can pause the puzzle and reclaim the room in seconds. If your goal is learning how to make a puzzle table that stores flat, focus on a topper design with trays and a lid.
Finishing the Surface: Felt, Cork, or Sealed Wood
Your surface sets the feel of the build. Felt is soft and quiet. Cork adds grip and warmth. Sealed wood is easy to clean.
Felt or cork steps:
- Seal the raw wood top with a thin coat of poly. This prevents uneven glue soak.
- Dry fit the felt or cork. Cut it to the inside of the lip with a sharp knife.
- Apply adhesive per label. Contact cement works well. Spray both sides, wait until tacky, then lay it down.
- Roll and press. Work from center out to the edges. Trim any small overhangs.
- Weight the surface for one hour. Avoid seams if possible. If you must seam, overlap slightly and make a straight cut through both layers for a tight joint.
Sealed wood steps:
- Sand to 220 grit Smooth, dust-free surface.
- Apply three coats of water-based polyurethane Low odor, fast dry.
- Aim for satin sheen Fewer glare spots and good visibility of piece shapes.
Ergonomics and Comfort
Comfort matters for long sessions. When thinking about how to make a puzzle table you can use for hours, plan height, lighting, and edges.
Helpful targets:
- Height 28 to 30 inches for seated use, 36 to 38 inches for standing.
- Clearance 10 to 12 inches for knees if seated at the table.
- Lighting Bright, even light. Aim for 300 to 500 lumens per square foot over the table.
- Edge shape Ease all edges to avoid wrist pressure. A small round-over works well.
If your neck or back aches, raise the table by one inch. Small changes go a long way. I also keep a soft wrist rest near the edge to reduce pressure.
Budget, Time, and Skill Level
You can keep costs low with smart choices. Basic plywood and pine rails work well. Fancy hardwoods look great but cost more.
Typical ranges:
- Basic build 80 to 150 dollars tools not included
- Premium build 200 to 400 dollars hardwood, trays, casters, and a lid
- Time 6 to 10 hours over a weekend, plus finish drying time
If this is your first try at how to make a puzzle table, skip drawers and casters. Build the simple frame and lip. You can add trays later with pocket screws and slides.

Care and Maintenance
A little care keeps the table like new. Keep it dry and clean. Avoid direct sun for long hours to reduce warping and fade.
Simple upkeep:
- Clean Dust with a soft brush. Use a lint roller on felt.
- Refresh finish Wipe with a damp cloth. Recoat with poly if it looks dull.
- Tighten hardware Check caster bolts and tray slides twice a year.
- Store right Keep it flat. Do not lean it for long periods.
Common Mistakes and How to Avoid Them
Many first builds share the same trouble spots. You can avoid them with a few checks.
Watch-outs:
- Top not flat Use thicker material or add a center brace.
- Lip too high Keep it at 0.25 to 0.5 inch so pieces are easy to pick up.
- Rough finish Sand to 220 grit and use thin finish coats.
- Weak joints Pre-drill, use glue, and clamp until dry.
- Poor felt bond Follow adhesive open time and use firm pressure when rolling.
When you think through how to make a puzzle table, put flatness and finish first. Looks come second. A flat, smooth table is a joy to use even if the wood is plain.
My Build Notes and Real-World Tips
I have built tables for small city apartments and big family rooms. The best feedback I get is about quiet, soft surfaces and easy storage. A thin felt layer with a satin finish on the lip is a sweet spot.
What I learned:
- Trays are gold Two trays change the way you sort and store in progress.
- Light lid beats heavy The lighter the cover, the more you use it.
- Water-based finish wins It dries fast, smells less, and stays clear.
- Plan the final path Measure doors and hallways before you build large.
If you want a fast win and are learning how to make a puzzle table for the first time, build the compact plan with a felt inlay and soft pads. You will use it the same day you finish.
Frequently Asked Questions of how to make a puzzle table
What is the best size for a puzzle table?
For 1,000-piece puzzles, aim for at least 26 by 36 inches of working area. This gives room for trays and keeps edges inside the lip.
What surface is best, felt, cork, or wood?
Felt is soft and quiet, cork has grip and warmth, and sealed wood is easy to clean. Choose based on how you like pieces to slide and how you clean.
How tall should the lip be?
Keep the lip between 0.25 and 0.5 inch. This stops pieces from falling yet lets you pick them up with ease.
Can I build it without many tools?
Yes. A circular saw with a guide, a drill, and a sander are enough. Take slow cuts and pre-drill holes for clean results.
How do I protect the puzzle from pets or dust?
Add a light cover with magnets or clips. A fabric dust cover also works if you need a fast and cheap option.
How long does it take to build?
Most people can build it over a weekend. Add more time for finish coats and any drawers or casters.
Is MDF okay for the top?
MDF is very flat and budget friendly. Seal all faces and edges with finish to resist moisture and wear.
Conclusion
You now know how to make a puzzle table that is flat, smooth, and built to last. Start with the right size, add a gentle lip, and choose a surface that suits your style. Keep the build simple on your first try, then add trays, a cover, and casters as you need them.
Pick a plan, gather your tools, and start this weekend. You will enjoy your puzzles more and protect every piece. Share your build, subscribe for more plans, and leave a comment with your own tips and upgrades.